Multilingual Support
Cinchy provides multilingual support for your platform via three system tables and an API endpoint.
The three system tables used in this process are:
[Cinchy].[Literals]: This table stores your literals (i.e. the words or phrases you want to translate into another language).[Cinchy].[Literal Translations]: This table stores all the translations of the literals added in the[Cinchy].[Literals]table. These translations are then called by the Translation API.[Cinchy].[Literal Groups]: This table is used to track groups that literals can belong to. Any literal with the default Cinchy GUID string automatically belongs to the "Cinchy" group. It is recommended to create one literal group per applet/UI so that you can retrieve the full list of GUIDs more easily.
Using a POST request, you can then pass in a word/phrase from the [Cinchy].[Literals] table and it will return to you the translation from the [Cinchy].[Literal Translations] table.
Logic
- If the translation exists in the language and region specified, it will be returned.
- If the translation exists in the language but not the specified region, it will still be translated and returned.
- If the GUID exists but it's not available in the specified language, the default text in the Literals table will return.
- If the GUID doesn't exist or you don't have permission to it, it will return the GUID back as the translation.
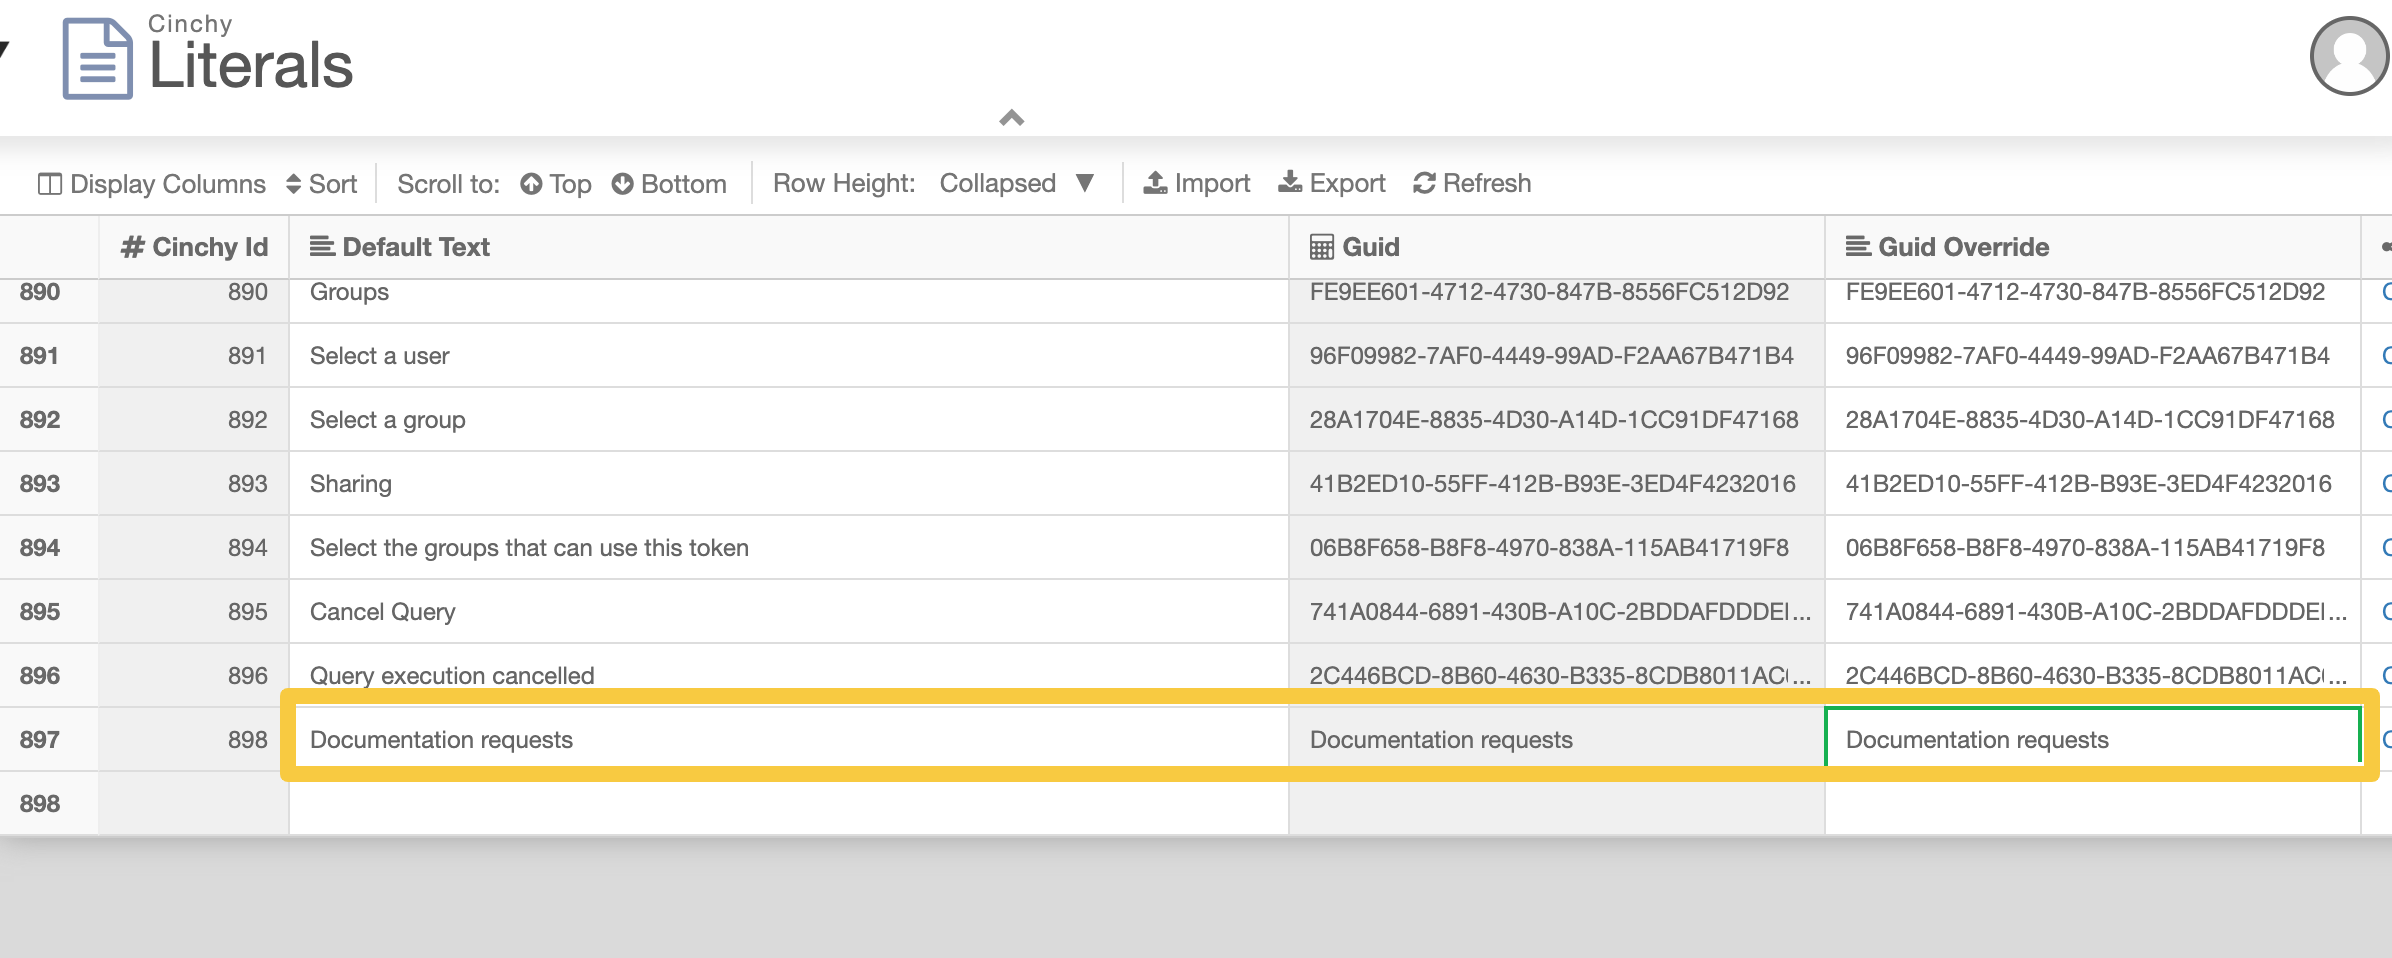
Adding a Literal
Before calling a literal translation with the API endpoint, you must first add it into your platform via the Literals table.
- Navigate to
[Cinchy].[Literals]. - In a new row, input the following data:
- Default Text: The word/phrase that you want translated.
- Example: "Documentation requests"
- Guid Override: A UUID is automatically assigned to any new row (and will appear in the GUID cell), but you are able to override the string to something more user-friendly if you prefer.
- Example: "Documentation requests"
- Literal Group: Literals can be added into groups for organizational purposes. All literals must belong to a group -- by default it will be the "Cinchy" group. A literal can belong to more than one group.
- Default Text: The word/phrase that you want translated.
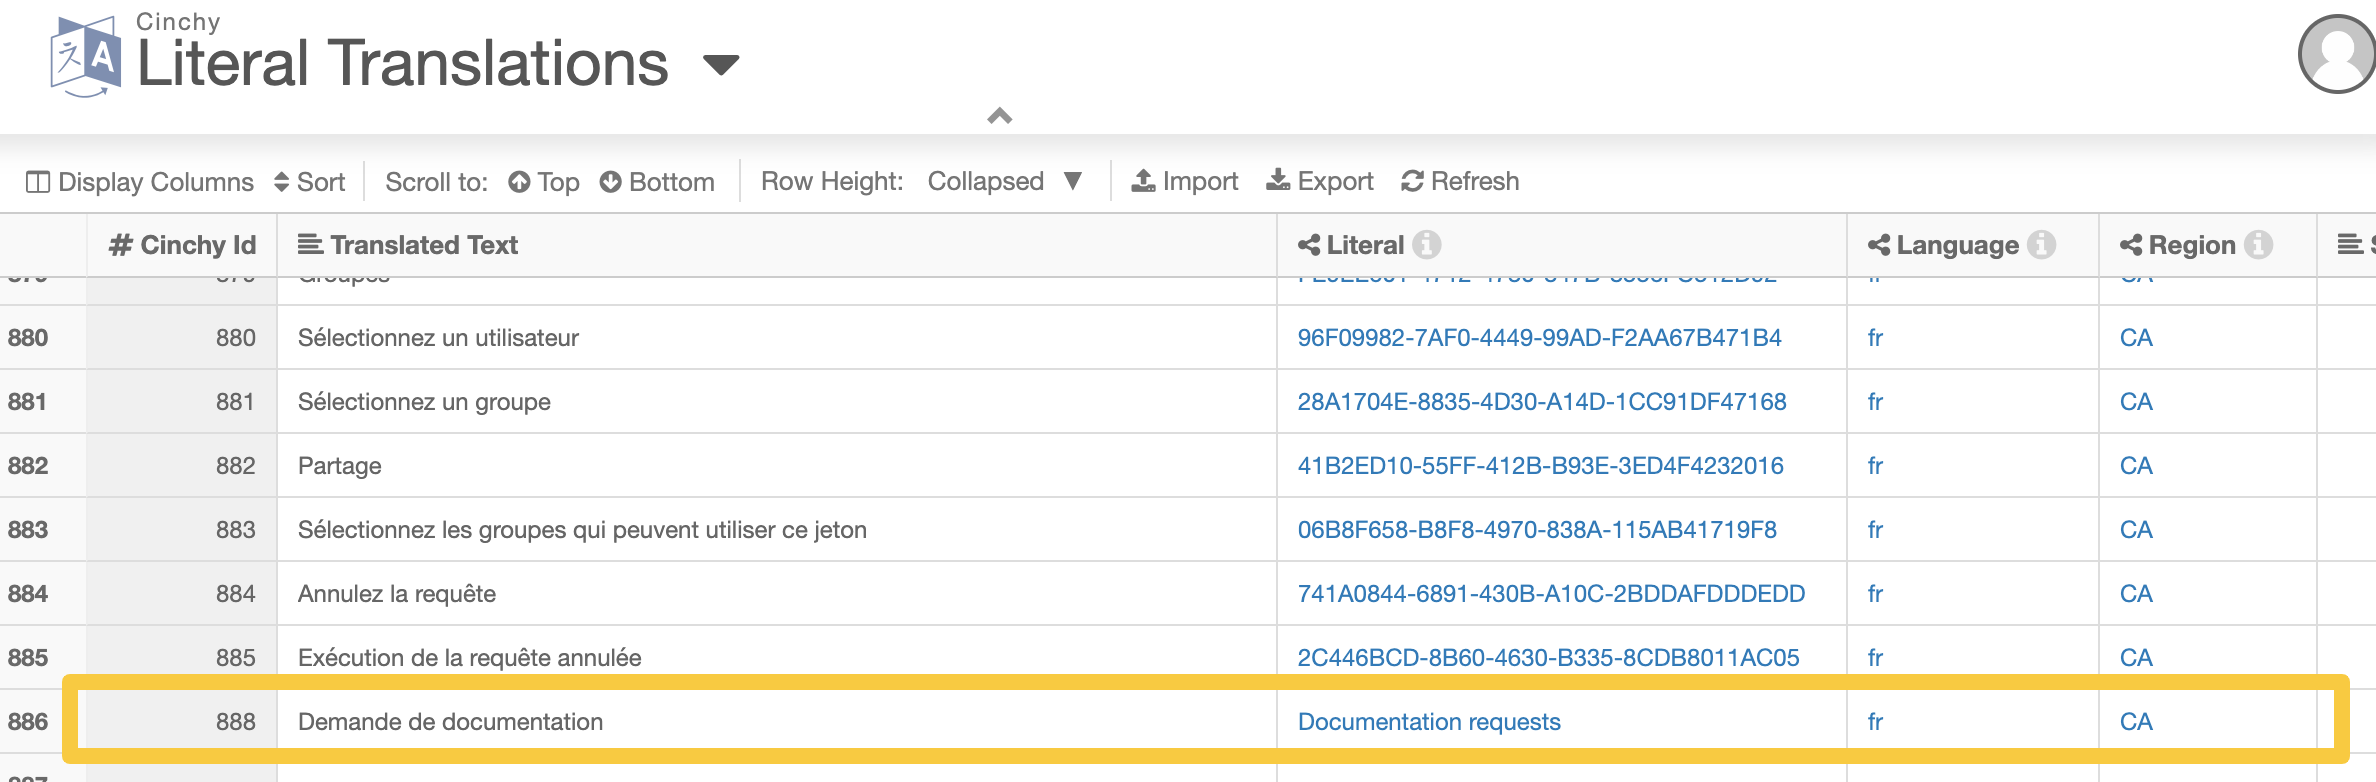
Adding a Literal Translation
Once your literal has been added, you must also add in your translation.
- Navigate to
[Cinchy].[Literal Translations]. - In a new row, input the following data:
- Translated Text: The translation of the literal.
- Example: "Demande de documentation"
- Literal: A link column that references the
[Cinchy].[Literals]table. Select the word/phrase that you added in the above section.- Example: "Documentation requests"
- Language: Refers to the language of the translated text.
- Example: "fr"
- Region: The region of the translated language. This optional field can be useful for regions with different spellings, for example "color" vs "colour".
- Example: "CA"
- Translated Text: The translation of the literal.
Optional: Add a New Literal Group
While all literals are added to the default "Cinchy" group, you are able to define your own groups as well. We recommend having a new group for each applet that you are creating, in order to find all your literals easily. To add in a new group:
- Navigate to
[Cinchy].[Literal Groups]. - In a new row, add in the name of your new group.
Using the Translation API
Once your literal, translation, and groups are set, you can use the Translation API to access your data.
Endpoint
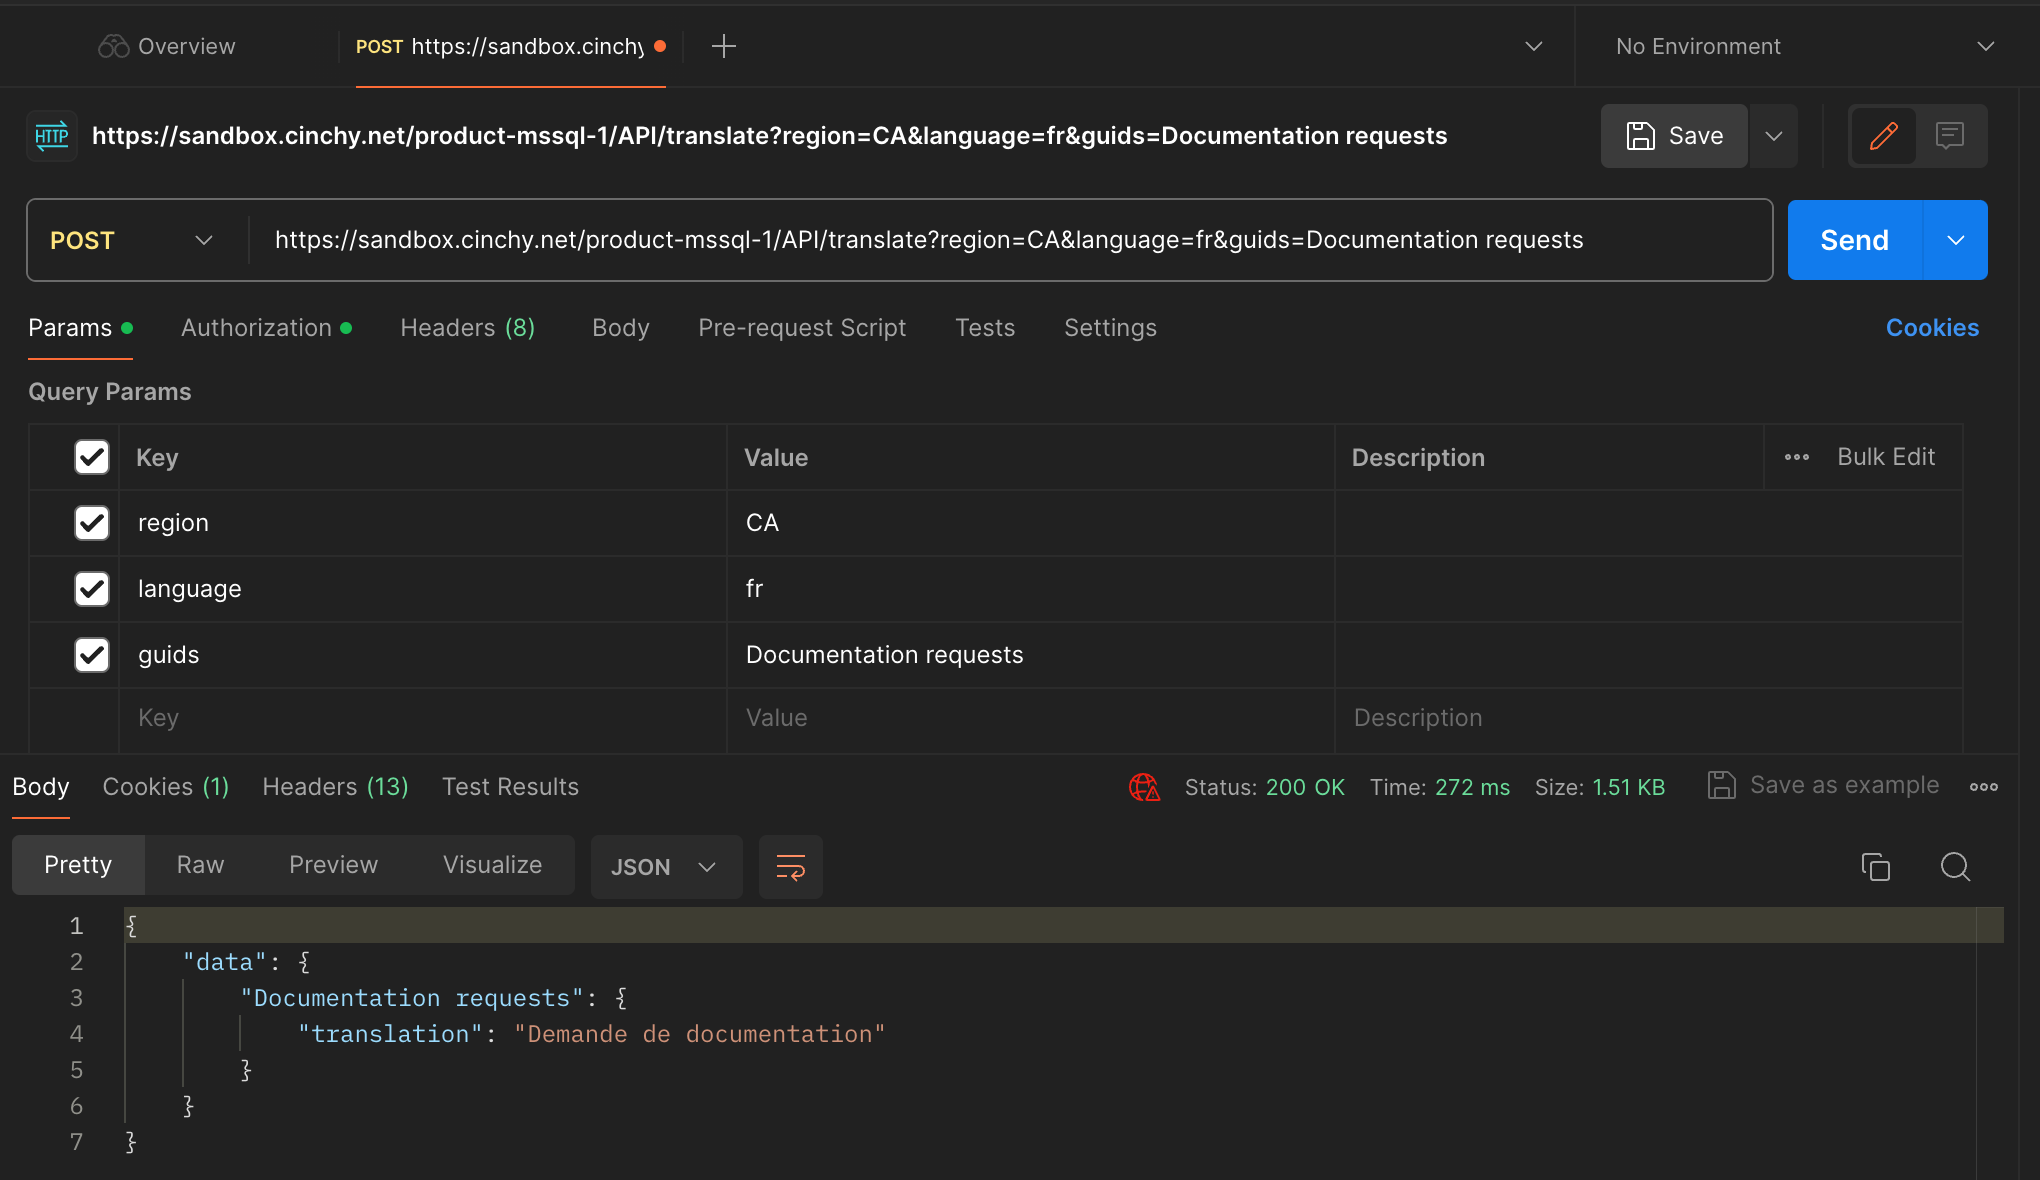
Use the below endpoint and parameters to return your translations.
POST <Cinchy-URL>/API/Translate
Parameters
| Parameter | Description | Example |
|---|---|---|
| debug | When set to true this will explain why the string was returned as the translation. This boolean value defaults to false when not specified. | false |
| region | The Region that was set for your translated literal. | CA |
| guids | The GUID, or GUID Override, of your literal. | Documentation requests |
| language | The Language that was set for your translated literal. | fr |
Authorization
You must also pass in some form of Authorization for the API. This can be in the form of a Bearer Token or a Personal Access Token.
Responses
- 200
A successful response example:
{
  "data": {
    "Documentation requests": {
        "translation": "Demande de documentation"
    }
  }
}