Indexing and partitioning
Indexing
Use indexing to improve query performance on frequently searched columns within large data sets. Without an index, Cinchy begins a data search with the first row of a table and then follows through the entire table sequentially to find all relevant rows. The larger the table(s), the slower the search.
If the table you are searching for has an index for its column(s), however, Cinchy is able to search much quicker.
When you set up an index for a field/column, an indexed version of your table is created that's sorted sequentially/alphabetically.
When you run your query on this index, that table will be searched using a binary search.
A binary search won't start from the top record. It will check the middle record with your search criteria for a match. If a match it not found, it will check whether the found value is larger or smaller than the desired value. If smaller, it reruns the data check with the top half of the data, finding the median record. If larger, it reruns the data check with the bottom half of the data, finding the median record. It will repeat until your data is found.
Cinchy supports the following types of indexes:
- Nonclustered
- Clustered (TSQL only)
- Unique
- Indexes on temp tables
- Full-text (TSQL only)
- Columnar (TSQL only)
Create a regular index via UI
Indexes created via UI are nonclustered.
- Select Design Table > Indexes from the left navigation tab of your table.
- Select "Click Here to Add" and fill out the following information for a new index:
| Parameter | Description | Example |
|---|---|---|
| Index name | A name for your index. | Example index |
| Add column | Select the column(s) to add to your index. You can select more than one column per index. | Full Name |
| Sort order | v5.15.3+: Define whether your index columns are sorted in ascending or descending order. In older version of the platform, columns are defaulted to ascending order. | ASC |
| Included column | The difference between regular columns and included columns is that indexes with included columns provide the greatest benefit when covering your query because you can include all columns your query may reference, such as columns with data types, numbers, or sizes not allowed as index key columns. For more on included columns, click here. | |
| Unique | A unique index guarantees that the index key contains no duplicate values and therefore every row in the table is in some way unique. |
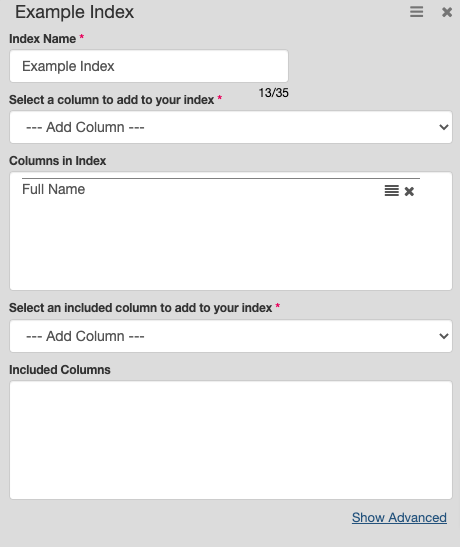
- Save your table.
If you need to change the ordering of a unique index created via the UI for singular columns, you must disable the unique tag and redefine the index in another request.
Create a regular index via CQL
CQL only supports CREATE INDEX and DROP INDEX; it does not support ALTER INDEX.
In Cinchy v5.15.3+, you can also add indexes to temp tables created with CQL.
Optional parameters
| Parameter | Description |
|---|---|
SortOrder (Cinchy v5.15.3+) | Defines whether the index runs in ASC or DESC order. In older versions of the platform, or if left undefined, the index will default to ascending order. |
UNIQUE | Specifies a unique constraint on the index. |
CLUSTERED (TSQL only) | Specifies that the index is clustered. If left undefined, the index will default to nonclustered. |
- Use the below query to create a regular index via CQL.
-- Blank example
CREATE INDEX [Index name]
ON [Domain].[Table] ([Column] SortOrder);

-- Populated example
CREATE INDEX [CQL_INDEX]
ON [HR].[Employees] ([Full Name] ASC);
Indexing a temp table
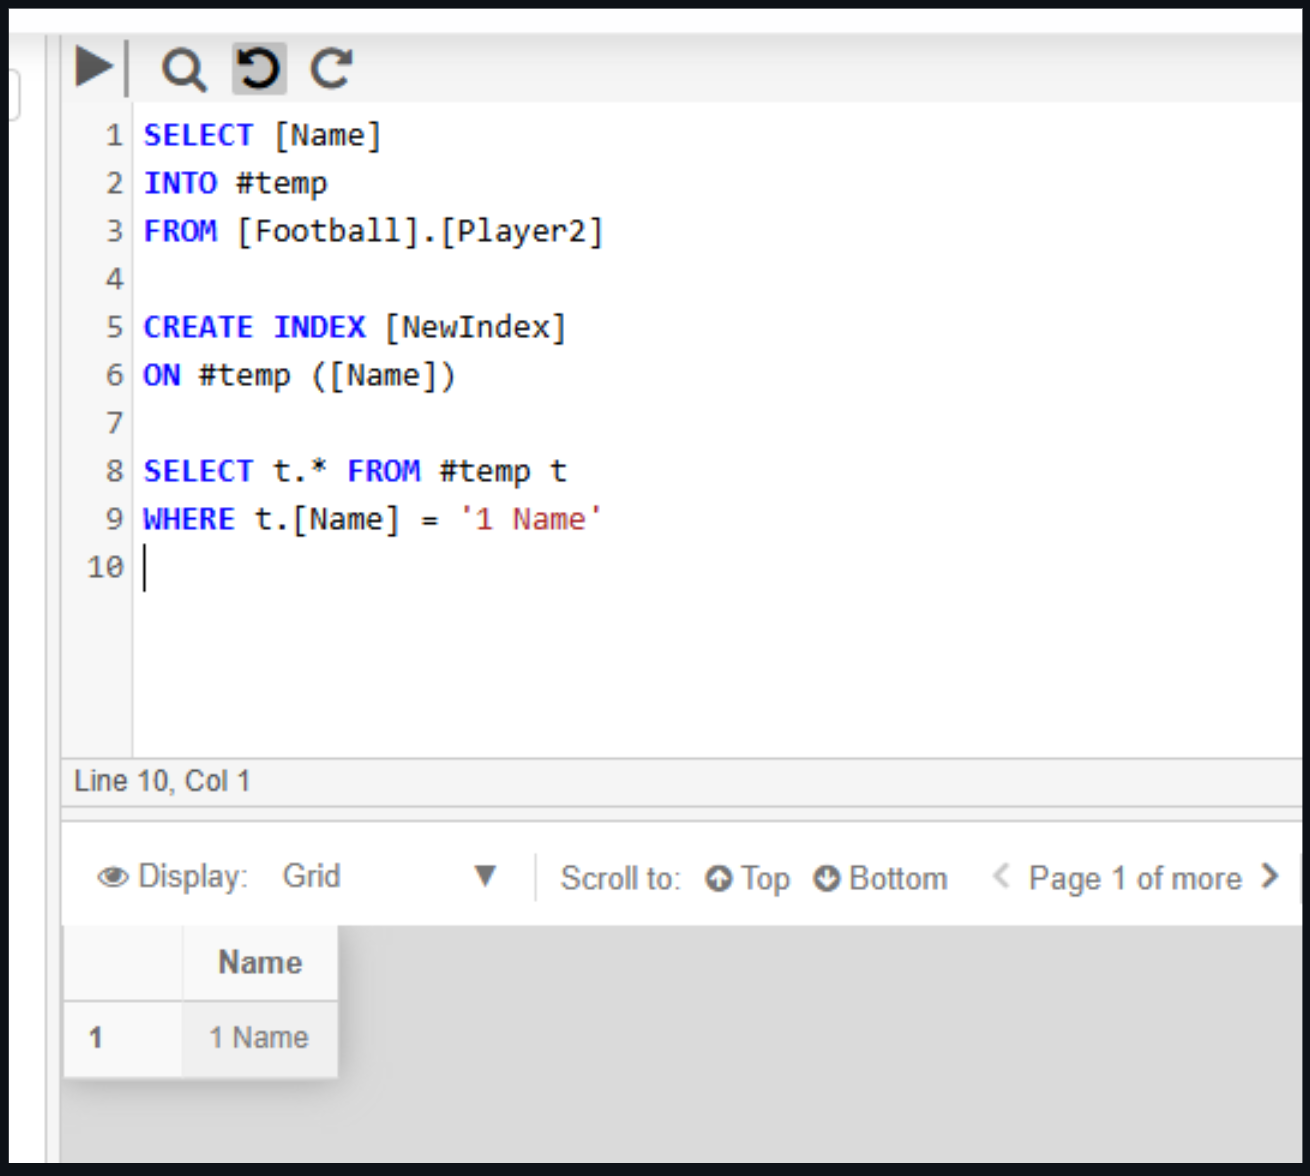
In Cinchy v.5.15.3+, you can add an index to a temp table using CQL.
When creating a temporary index in TSQL on a multi-select link, multi-select hierarchy link, or a non-cached calculated column, you must add an explicit CAST conversion to your expression.
For example:
SELECT [MULTI SELECT LINK COL]= CAST([MULTI SELECT LINK COL] AS VARCHAR(1000))  INTO #tempTbl1 FROM [QA].[Smoke Source Table]
create Index [NewMSLIdx] on #tempTbl1 ([MULTI SELECT LINK COL])
select q.* FROM #tempTbl1 q
Example:
SELECT [Name]
INTO #temp
FROM [Football].[Player2]

CREATE INDEX [NewIndex]
ON #temp ([Name])

SELECT t.* FROM #temp t
WHERE t.[Name] = '1 Name`
Full-text indexing
A full-text index is a special index type that provides index access for full-text queries against character or binary column data. A full-text index breaks the column into tokens and these tokens make up the index data.
Full-text indexing is available in TSQL environments.
Set up a full-text index
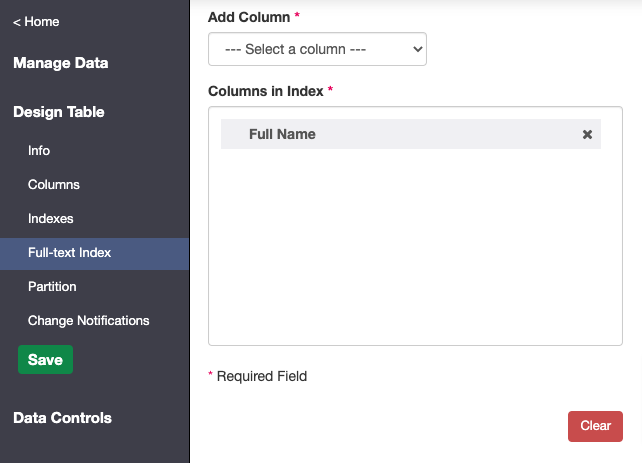
- Click on Design Table > Full-text Index
- Add in the desired column(s) and click save when done (Image 5).
Columnar indexing
Columnar Indexing (also known as Columnstore indexing) is available when running SQL Server 2016+.
Columnar indexing is available in TSQL environments.
Columnar indexes are used for storing and querying large tables. This index uses column-based data storage and query processing to improve query performance. Instead of rowstore or b-tree indexes where the data is logically and physically organized and stored as a table with rows and column, the data in a columnstore indexes is physically stored in columns and logically organized in rows and columns.
You may want to use a columnar index when:
- Your table has over 1 million records.
- Your data is rarely modified. Having large numbers of deletes can cause fragmentation, which adversely affect compression rates. Updates are also processed as deletes followed by inserts, which will adversely affect the performance of your loading process.
Set up columnar indexing
- Click on Design Table > Columnar Index
- Add in the desired column(s) and click save when done (Image 6).
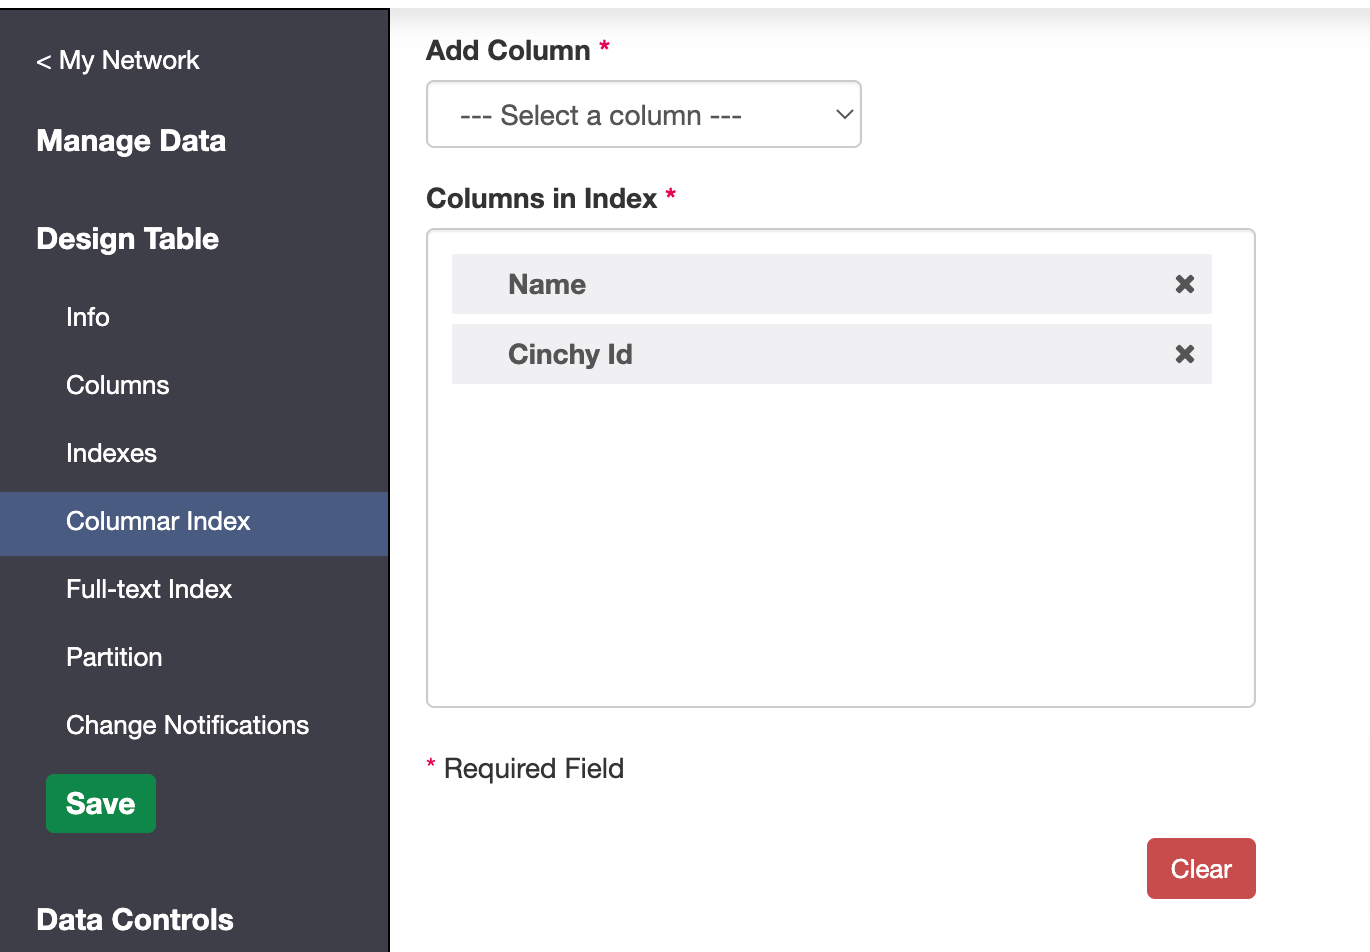
When using a Columnar Index, you won't be able to add any new columns to your table. You will need to delete the index, add your column(s), and then re-add the index.
Partitioning data
Partitioning data in a table is essentially organizing and dividing it into units that can then be spread across more than one file in a database. The benefits of this are:
- Improved efficiency of accessing and transferring data while maintaining its integrity.
- Maintenance operations can be performed on one or more partitions more efficiently.
- Query performance is improved based on the types of queries most frequently run.
When creating a partition in Cinchy, you use the values of a specified column to map the rows of a table into partitions.
Set up a partition
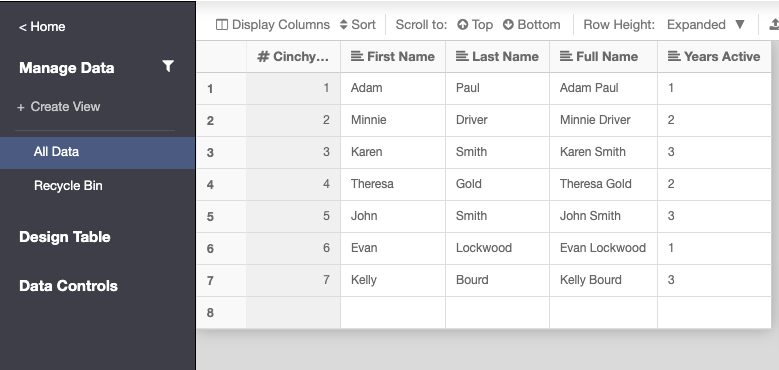
This example sets up a partition that divides the employees based on a Years Active column (Image 7). You want to divide the data into two groups: those who have been active for two years or more, and those who have only been active for one year.
- Click on Design Table > Partition
- Fill in the following information and click save when done (Image 8):
- Partitioning Column: this is the column value that will be used to map your rows. This example uses the Years Active column.
- Type: Select either Range Left (which means that your boundary will be
<=) or Range Right (where you boundary is only<). In this example we want our boundary to be Range Left. - Add Boundary: Add in your boundary value(s). Click the + key to add it to your boundary list. In this example we want to set our boundary to 2.
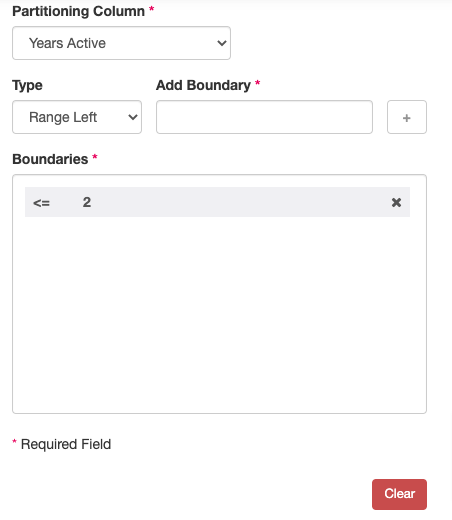
Once set up, this partition will organize the data into two groups, based on our boundary of those who have a Years Active value of two or above.
- You can now run a query on your partitioned table (Image 9).
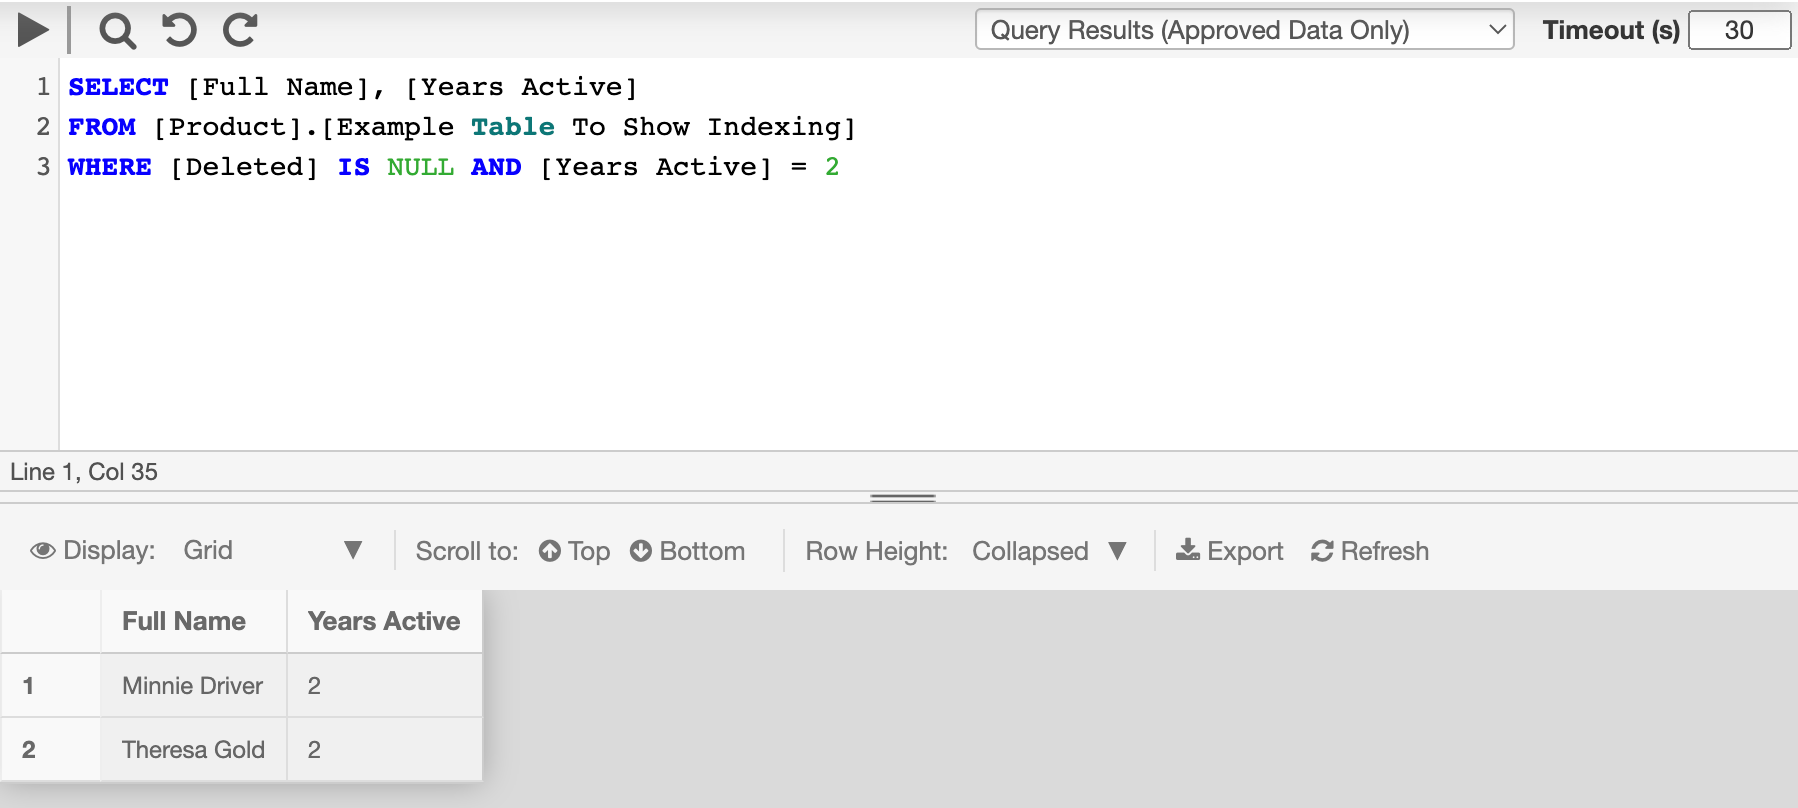
Note that there is no UI change in the query builder or your results when running a query on a partitioned table. The difference will be in the speed of your returned results.
For more formation on creating, modifying or managing Partitioning, please visit Microsoft's Partitioned table and Indexes documentation.
Best Practices for large tables
For optimal performance in Cinchy when dealing with large tables, particularly those with over 10 million records, we recommend creating an index on the 'Deleted' and 'Cinchy Id' columns. This index has proven effective in reducing render times and preventing timeouts.
Add the Deleted & Cinchy ID index
- Select the target table: Select the table you want to change from the Cinchy home screen.
- Access Index Settings: Navigate to Design Table > Indexes.
- Create New Index: Select "Click Here to Add" and fill out the necessary details for your new index.
- Select Columns: Add 'Deleted' and 'Cinchy ID' columns to Columns in Index.
- Save Configuration: Verify and select Save.
By following these guidelines, users managing large datasets in Cinchy can achieve a more efficient and responsive data interaction experience.