Conditional calculated column examples
Conditional Calculated Columns work by applying a filter to source data, and then transforming the filtered data via a calculation. This is accomplished by using If/Then statement on a column/set of columns.
This page will provide some examples of using conditional calculated columns in the Connections Experience.
General Steps
To add a conditional calculated column to a sync:
- Navigate to the Source > Schema tab of the Connections experience for your data sync.
- Click Add a Column > Conditional. Note that you add a conditional column in addition to the existing source columns.
- Enter the following basic information about your column:
- Name: A name for your column. This name needs to be unique across all of your source columns.
- Description: A description of the condition and calculation in the column
- Data Type
- Enter the following information to define your condition and your calculation:
- Name: A name for your calculated condition.
- If: An
Ifstatement condition which, when evaluated to true, will filter specific records for your sync. Refer to the If Statements section below for more detail. - Then: A
Thencalculation which will trigger on all filtered records. Refer to the Then Statements section below for more detail.
If Statements
If statements support the 'conditional' aspect of the column. To create your If statement:
- Navigate to your conditional calculated column.
- Click on the Edit button under Condition > If.
- The UI that appears allows you to define rules or rulesets for the column.
- You can add multiple conditions to a single data sync by using the AND/OR and +Rule buttons.
- You are able to group your Rules into a rule set by using the +Ruleset button.
- Use the AND/OR toggle to define what kind of condition you want to set uup.
- Use the The left-most drop down to select a source column to attach the condition to
- Use The centre drop-down to select an operator for your condition (ex:
=,is not null, etc.) - Use the The right-most drop-down to define your condition. See the examples section below for guidance on the types of expressions you can use.
- You can optionally toggle the 'Use Columns' check box to turn the right-most drop-down into a list of columns instead of using an expression.
Then Statements
Then statements support the 'calculated' aspect of the column. To create your THEN statement:
- Navigate to your conditional calculated column.
- Click on the Edit button under Condition > Then.
- The UI that appears allows you to define your THEN action for the column, which will trigger when the IF statement evaluates to true.
- The 'Options' drop down provides guidance on what kind of functions can be used in your calculated expression. You can double-click on a function name to automatically populate it into the Expression box.
- The 'Data' drop down lists the columns in your source that the calculation can be applied to. Double-clicking on any of the columns will automatically populate it/them into the Expression box.
Default Expression
The default expression is an optional field that will run if none of the IF statements are evaluated to true.
Examples
Example 1
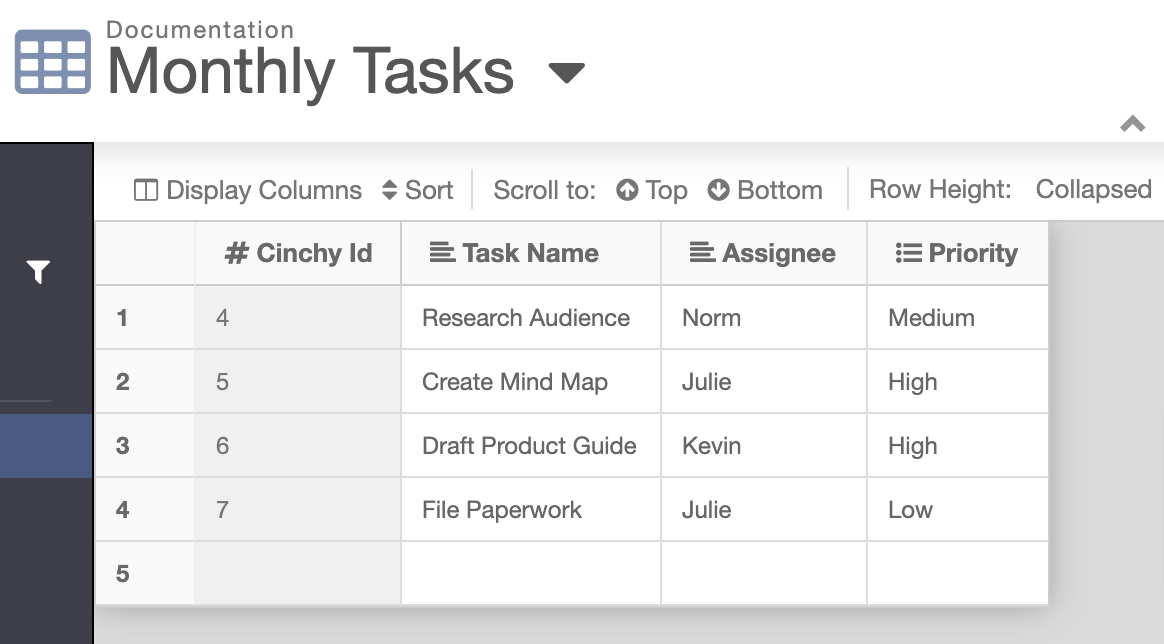
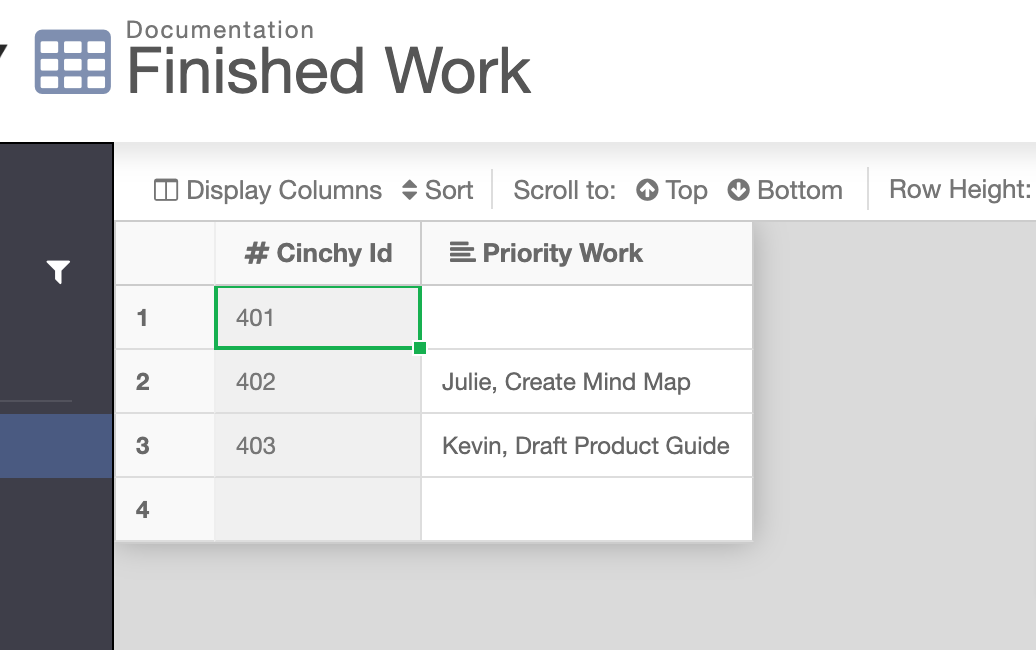
Use Case: Syncing data between two Cinchy tables, [Monthly Tasks] and [Priority Work]. The goal of this sync is to filter for monthly tasks marked as 'High Priority', create a calculated column based on those records that pulls together the task name, assignee, and priority, and sync those records into the destination table.
There are two steps to creating a conditional calculated column: (1) defining the condition, and (2) defining the calculation.
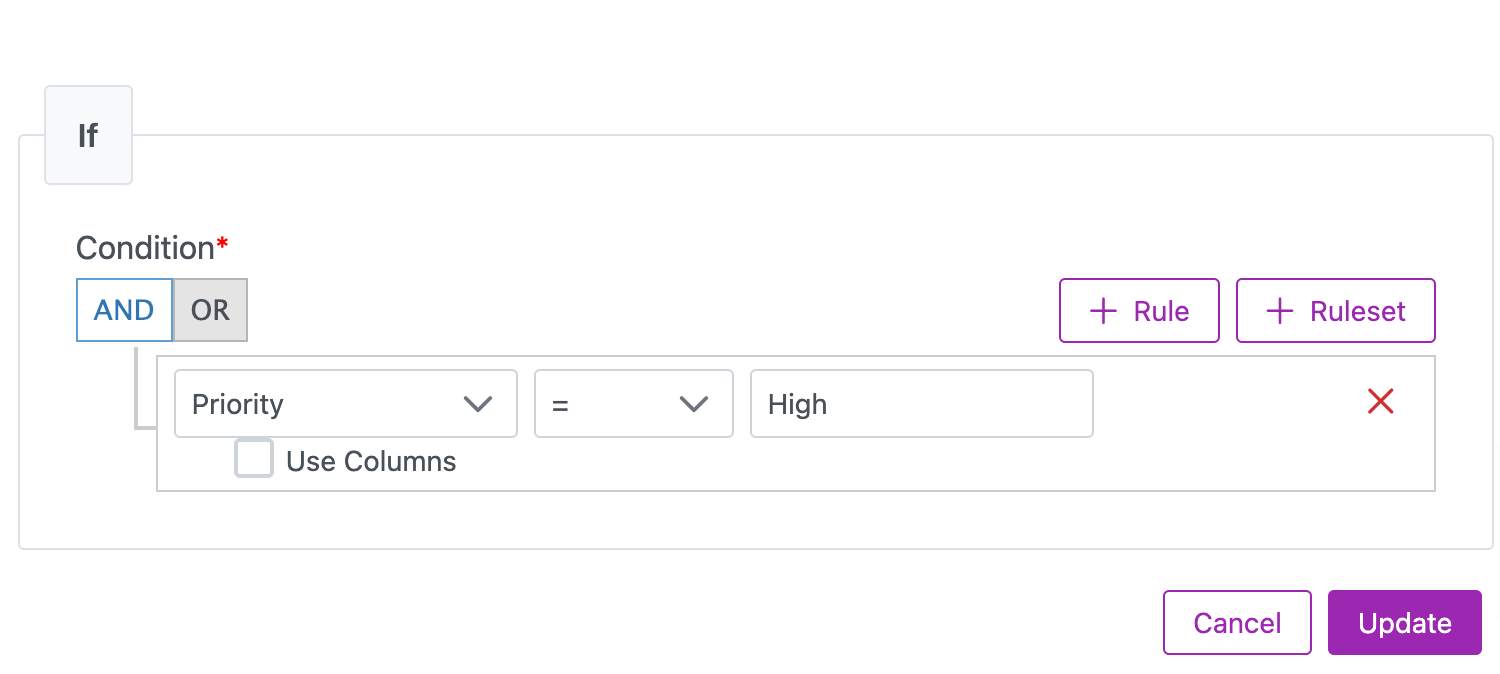
- Condition: In this example, we want our condition to filter for source records where
Priority = Highonly. This can be accomplished using the following IF statement:
IF [Priority] = 'High'
In the UI, this statement appears as such:
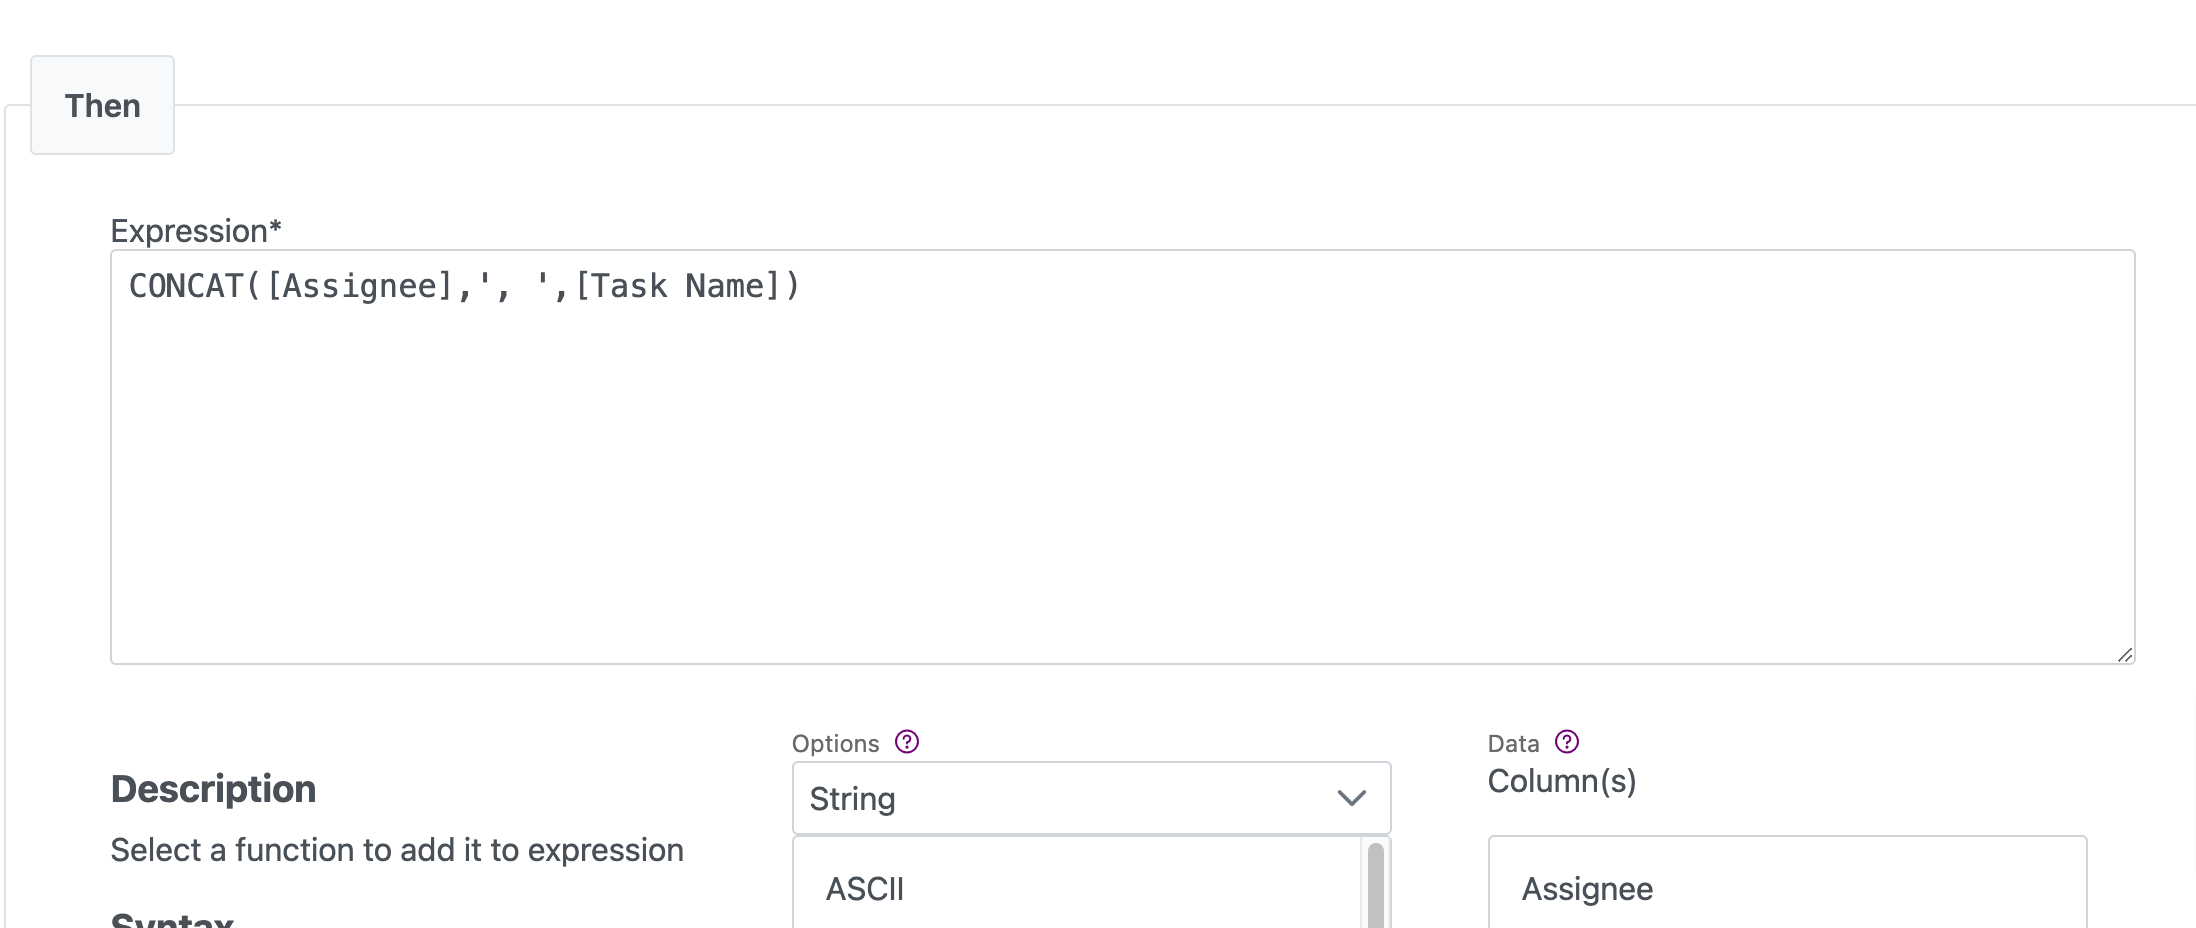
- Calculation: In this example, we want to add in a CONCAT calculation to join the
[Assignee]and[Task Name]columns together when syncing into the destination. This can be accomplished using the following THEN expression:
CONCAT([Assignee],', ',[Task Name])
In the UI, this expression appears as such:
- Default Expression: In this example, we also want to add in a default expression of
[Task Name]. This means that in the cases where the IF statement evaluates to false, the[Task Name]will still be synced in the destination table.
Results
Source Table:
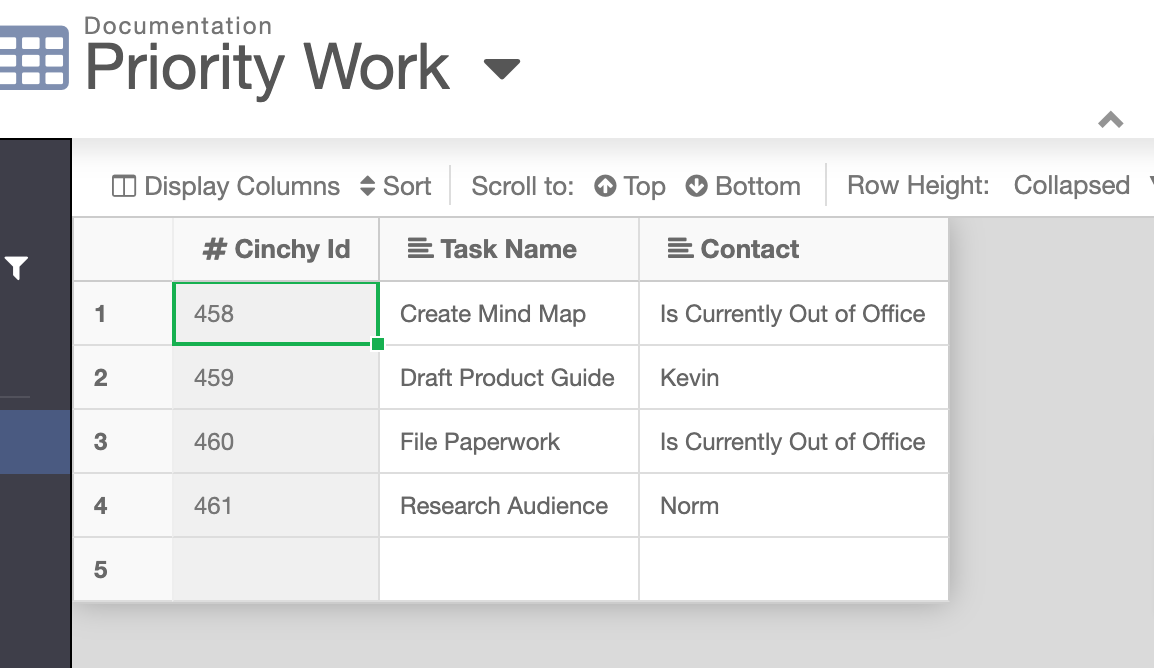
Destination Table, post-sync:
Example 2
Use Case: Syncing data between two Cinchy tables, [Monthly Tasks] and [Priority Work]. The goal of this sync is to filter for all of the following conditions:
[Assignee]is not null[Out of Office]= true
There are two steps to creating a conditional calculated column: (1) defining the condition, and (2) defining the calculation.
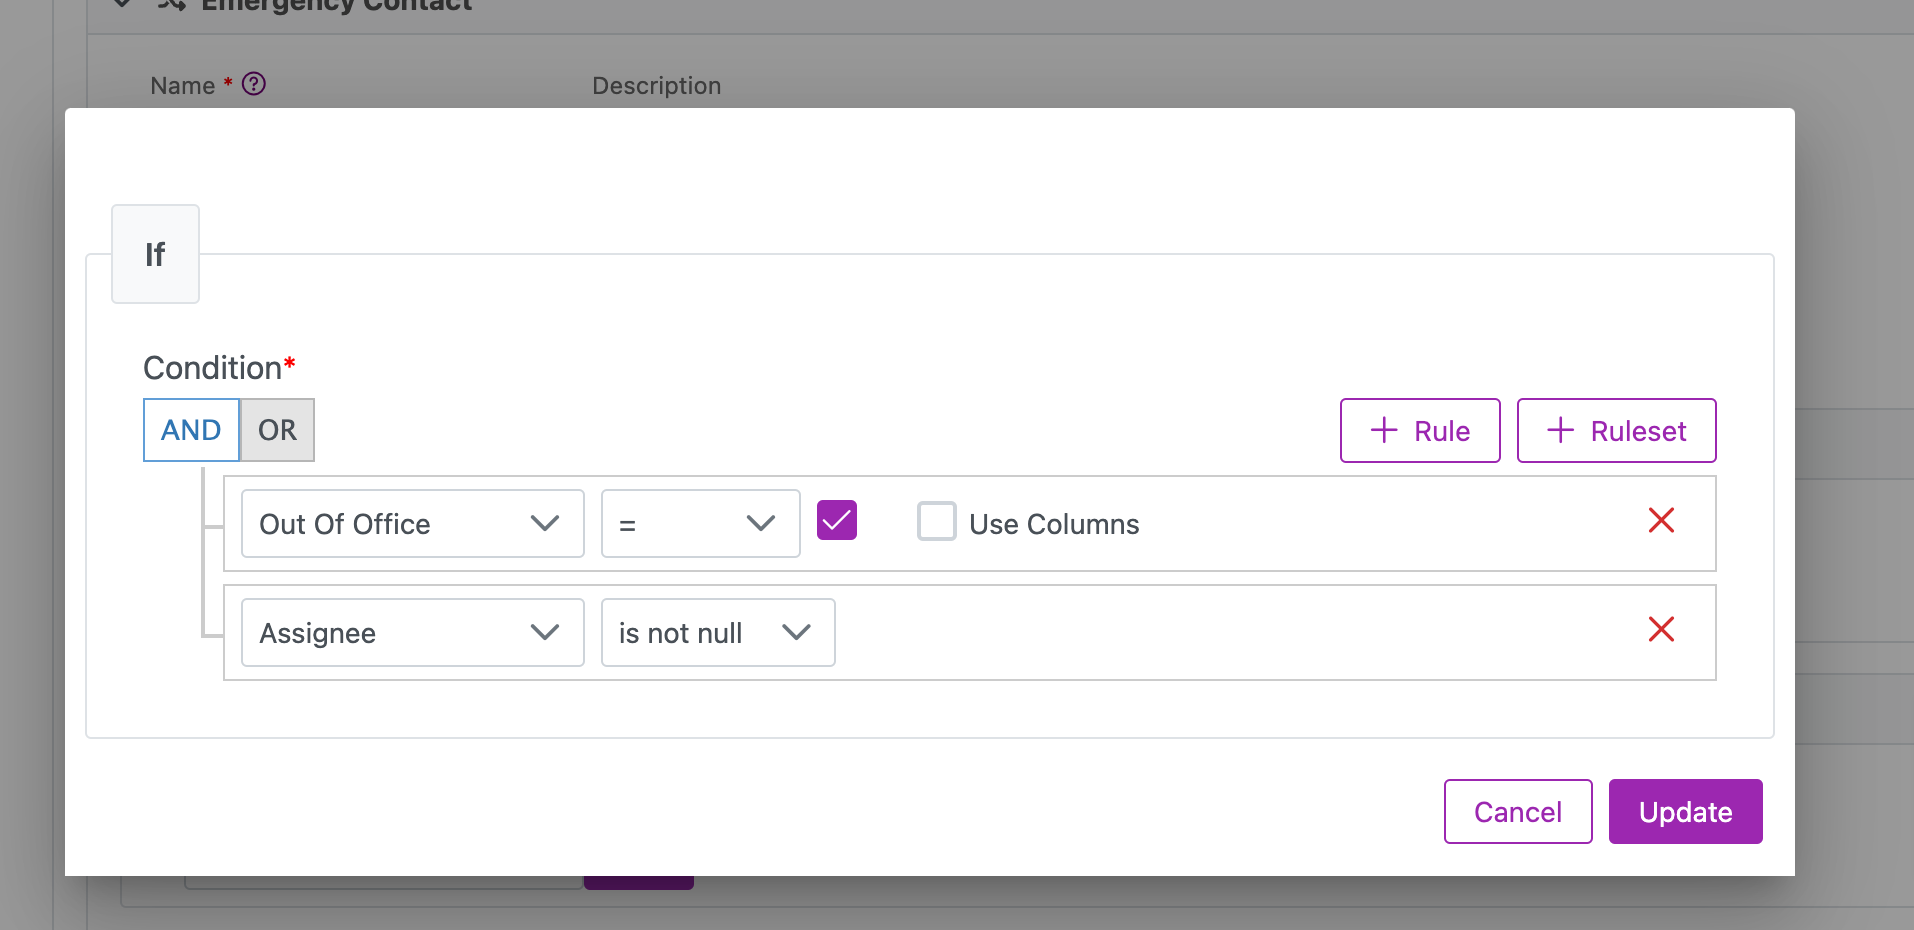
- Condition: In this example, we want our condition to filter for source records where the
[Assignee]column is not null AND the[Out of Office]boolean is true. This can be accomplished using the following IF statement:
[Assignee]is not null[Out of Office]= true
In the UI, this statement appears as such:
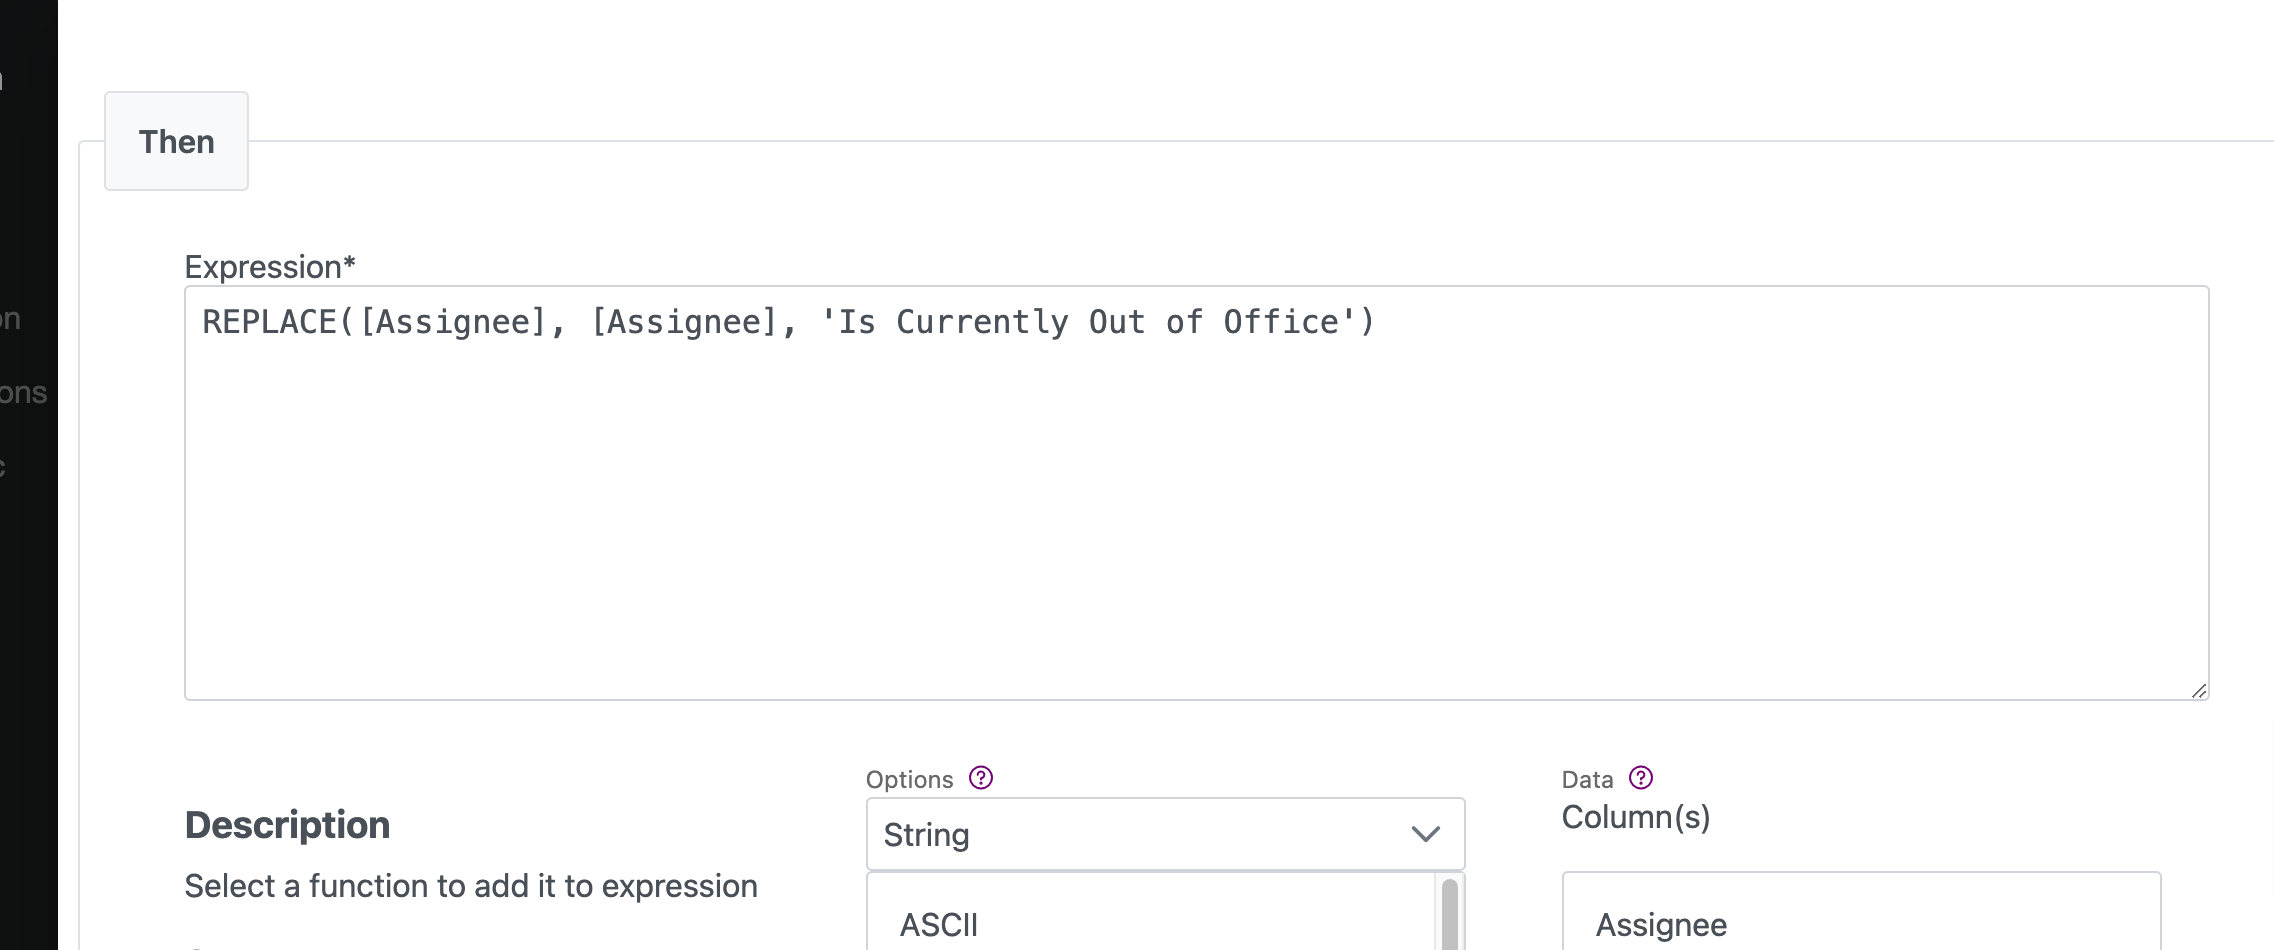
- Calculation: In this example, we want to add in a REPLACE calculation to the 'ASsignee' with 'Is Currently Out of Office.' This can be accomplished using the following THEN expression:
REPLACE([Assignee], [Assignee], 'Is Currently Out of Office')
In the UI, this expression appears as such:
- Default Expression: In this example, we also want to add in a default expression of
[Assignee]. This means that in the cases where the IF statement evaluates to false, the[Assignee]will still be synced in the destination table.
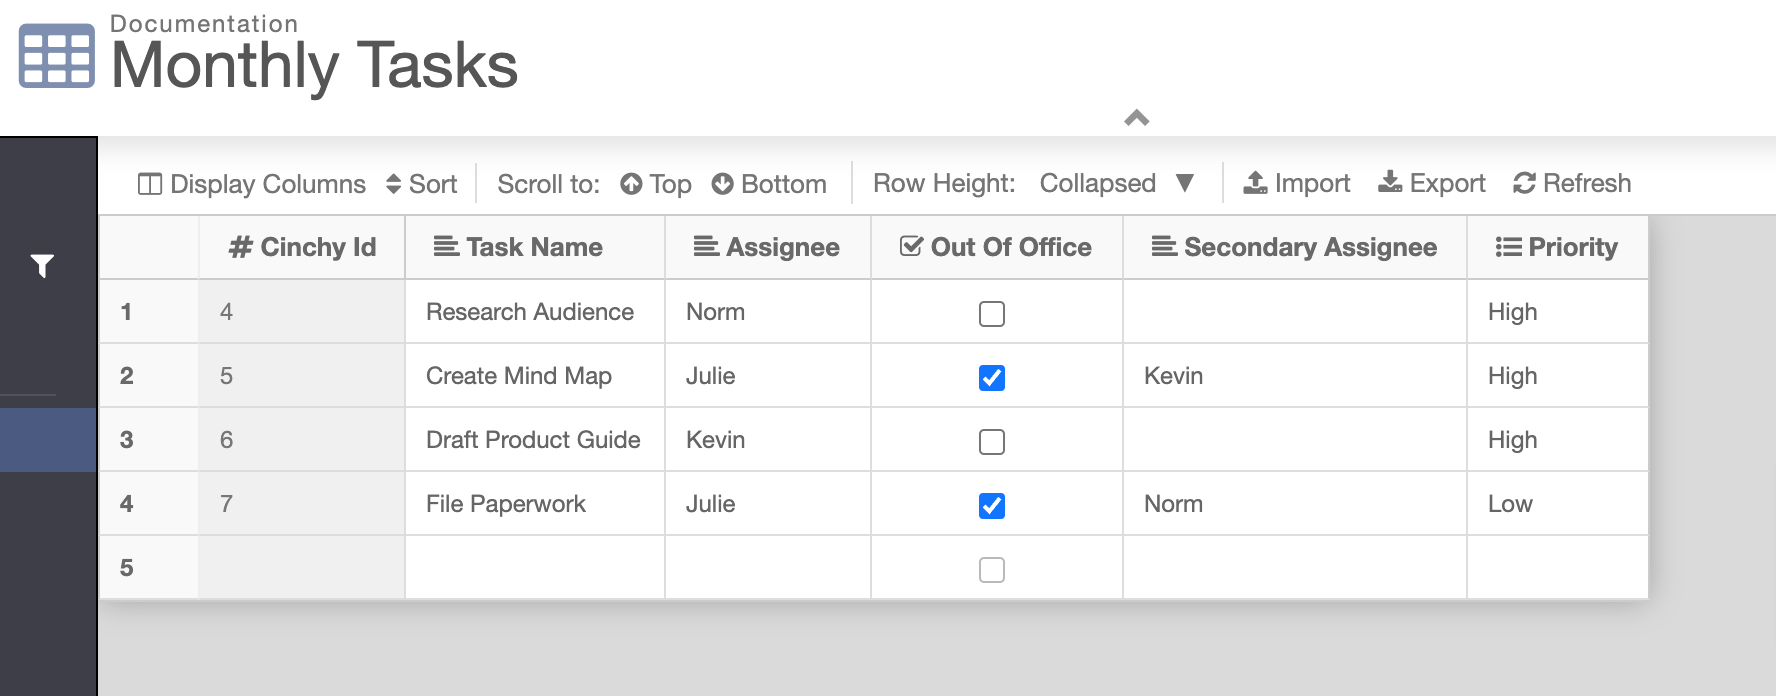
Results
Source Table:
Destination Table, post-sync:
