Dynamics
Overview
Microsoft Dynamics 365 functions as an interconnected CRM, ERP, and productivity suite that integrates processes, data, and business logic.
Example use case
You have customer information currently sitting in the Dynamics CRM software. You want to sync this data into Cinchy through a batch sync to liberate your data from the silo.
The Dynamics source supports batch syncs.
Info tab
You can find the parameters in the Info tab below (Image 1).
Values
| Parameter | Description | Example |
|---|---|---|
| Title | Mandatory. Input a name for your data sync | to Cinchy |
| Description | Optional. Add in a description for your sync. There is a 500 character limit in this field. | |
| Variables | Optional. Review our documentation on Variables herefor more information about this field. | |
| Permissions | Data syncs are role based access systems where you can give specific groups read, write, execute, and/or all of the above with admin access. Inputting at least an Admin Group is mandatory. |
Source tab
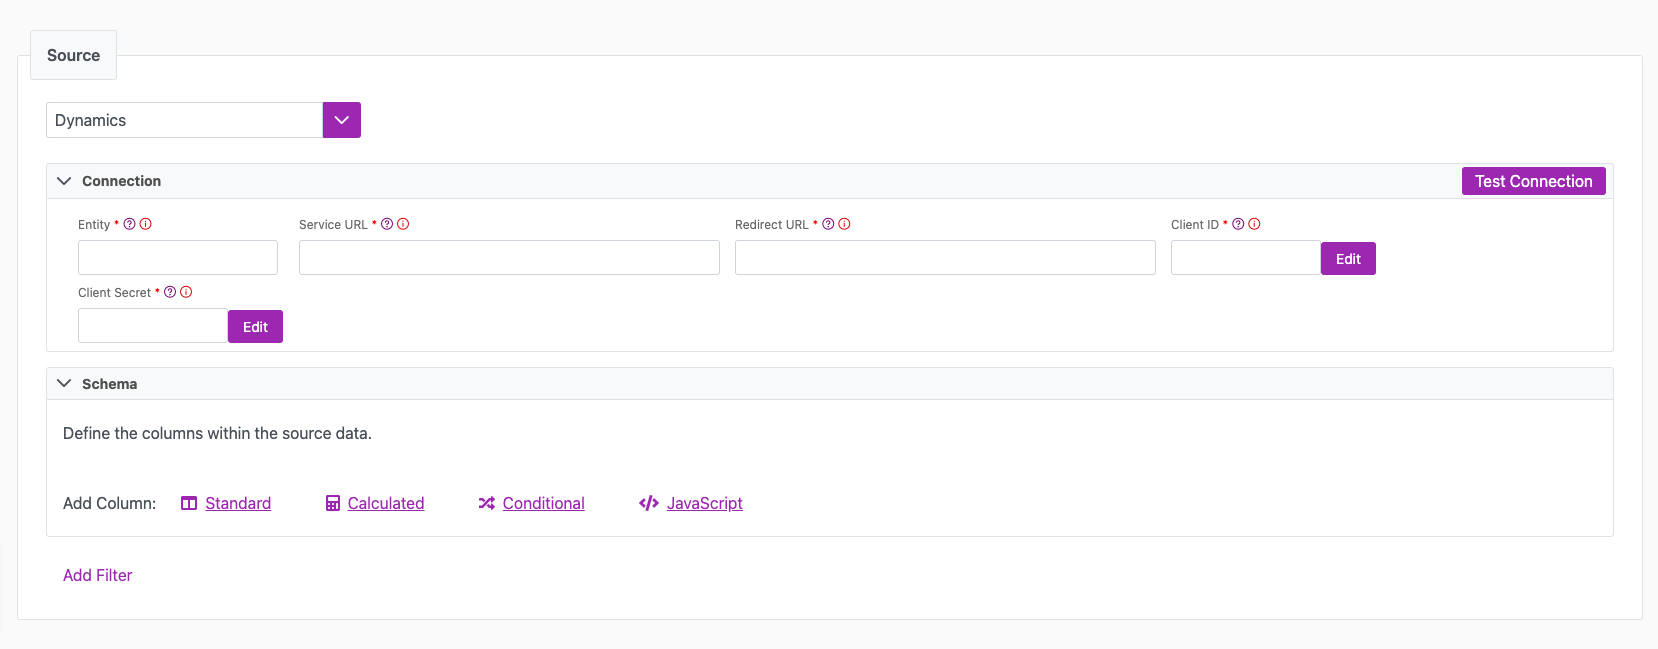
The following table outlines the mandatory and optional parameters you will find on the Source tab (Image 2).
- Source Details
- Schema
- Filter
The following parameters will help to define your data sync source and how it functions.
| Parameter | Description | Example |
|---|---|---|
| Source | Mandatory. Select your source from the drop down menu. | Dynamics |
| Entity | Mandatory. The name of the entity you want to sync as it appears in your Dynamics CRM. | Companies |
| Service URL | Mandatory. The Web API URL of your instance. | https://org.api.crm.dynamics.com/api/data/v9.0/ |
| Redirect URL | Mandatory. The Redirect URI from the Azure AD app registration | https://example.com/ |
| Client ID | Mandatory. The encrypted Client ID found in your Azure AD app registration. The Connection UI will automatically encrypt this value for you. | |
| Client Secret | Mandatory. The encrypted Client Secret found in your Azure AD app registration. The Connection UI will automatically encrypt this value for you. | |
| Timeout | Optional. Specify a valid timeout duration in seconds. If the value is left blank or is <=0 this parameter defaults to 100. | |
| Test Connection | You can use the "Test Connection" button to ensure that your credentials are properly configured to access your source. If configured correctly, a "Connection Successful" pop-up will appear. If configured incorrectly, a "Connection Failed" pop-up will appear along with a link to the applicable error logs to help you troubleshoot. |
The Schema section is where you define which source columns you want to sync in your connection. You can repeat the values for multiple columns.
| Parameter | Description | Example |
|---|---|---|
| Name | Mandatory. The name of your column as it appears in the source. | Name |
| Alias | Optional. You may choose to use an alias on your column so that it has a different name in the data sync. | |
| Data Type | Mandatory. The data type of the column values. | Text |
| Description | Optional. You may choose to add a description to your column. |
Select Show Advanced for more options for the Schema section.
| Parameter | Description | Example |
|---|---|---|
| Mandatory |
| |
| Validate Data |
| |
| Trim Whitespace | Optional if data type = text. For Text data types, you can choose whether to trim the whitespace._ | |
| Max Length | Optional if data type = text. You can input a numerical value in this field that represents the maximum length of the data that can be synced in your column. If the value is exceeded, the row will be rejected (you can find this error in the Execution Log). |
You can choose to add in a Transformation > String Replacement by inputting the following:
| Parameter | Description | Example |
|---|---|---|
| Pattern | Mandatory if using a Transformation. The pattern for your string replacement. | |
| Replacement | What you want to replace your pattern with. |
You have the option to add a source filter to your data sync. Please review the documentation here for more information on source filters.

Next steps
- Configure your Destination.
- Define your Sync Actions.
- Add in your Post Sync Scripts, if required.
- Select Jobs > Start a Job to begin your sync.