Delimited file
Overview
A delimited file is a sequential file with column delimiters. Each delimited file is a stream of records, which consists of fields that are ordered by column. Each record contains fields for one row. Within each row, individual fields are separated by column delimiters.
Example use case
You have a delimited file that contains your Employee information. You want to use a batch sync to pull this info into a Cinchy table and liberate your data.
The Delimited File source supports batch syncs.
The Delimited File source doesn't support Geometry, Geography, or Binary data types.
Info tab
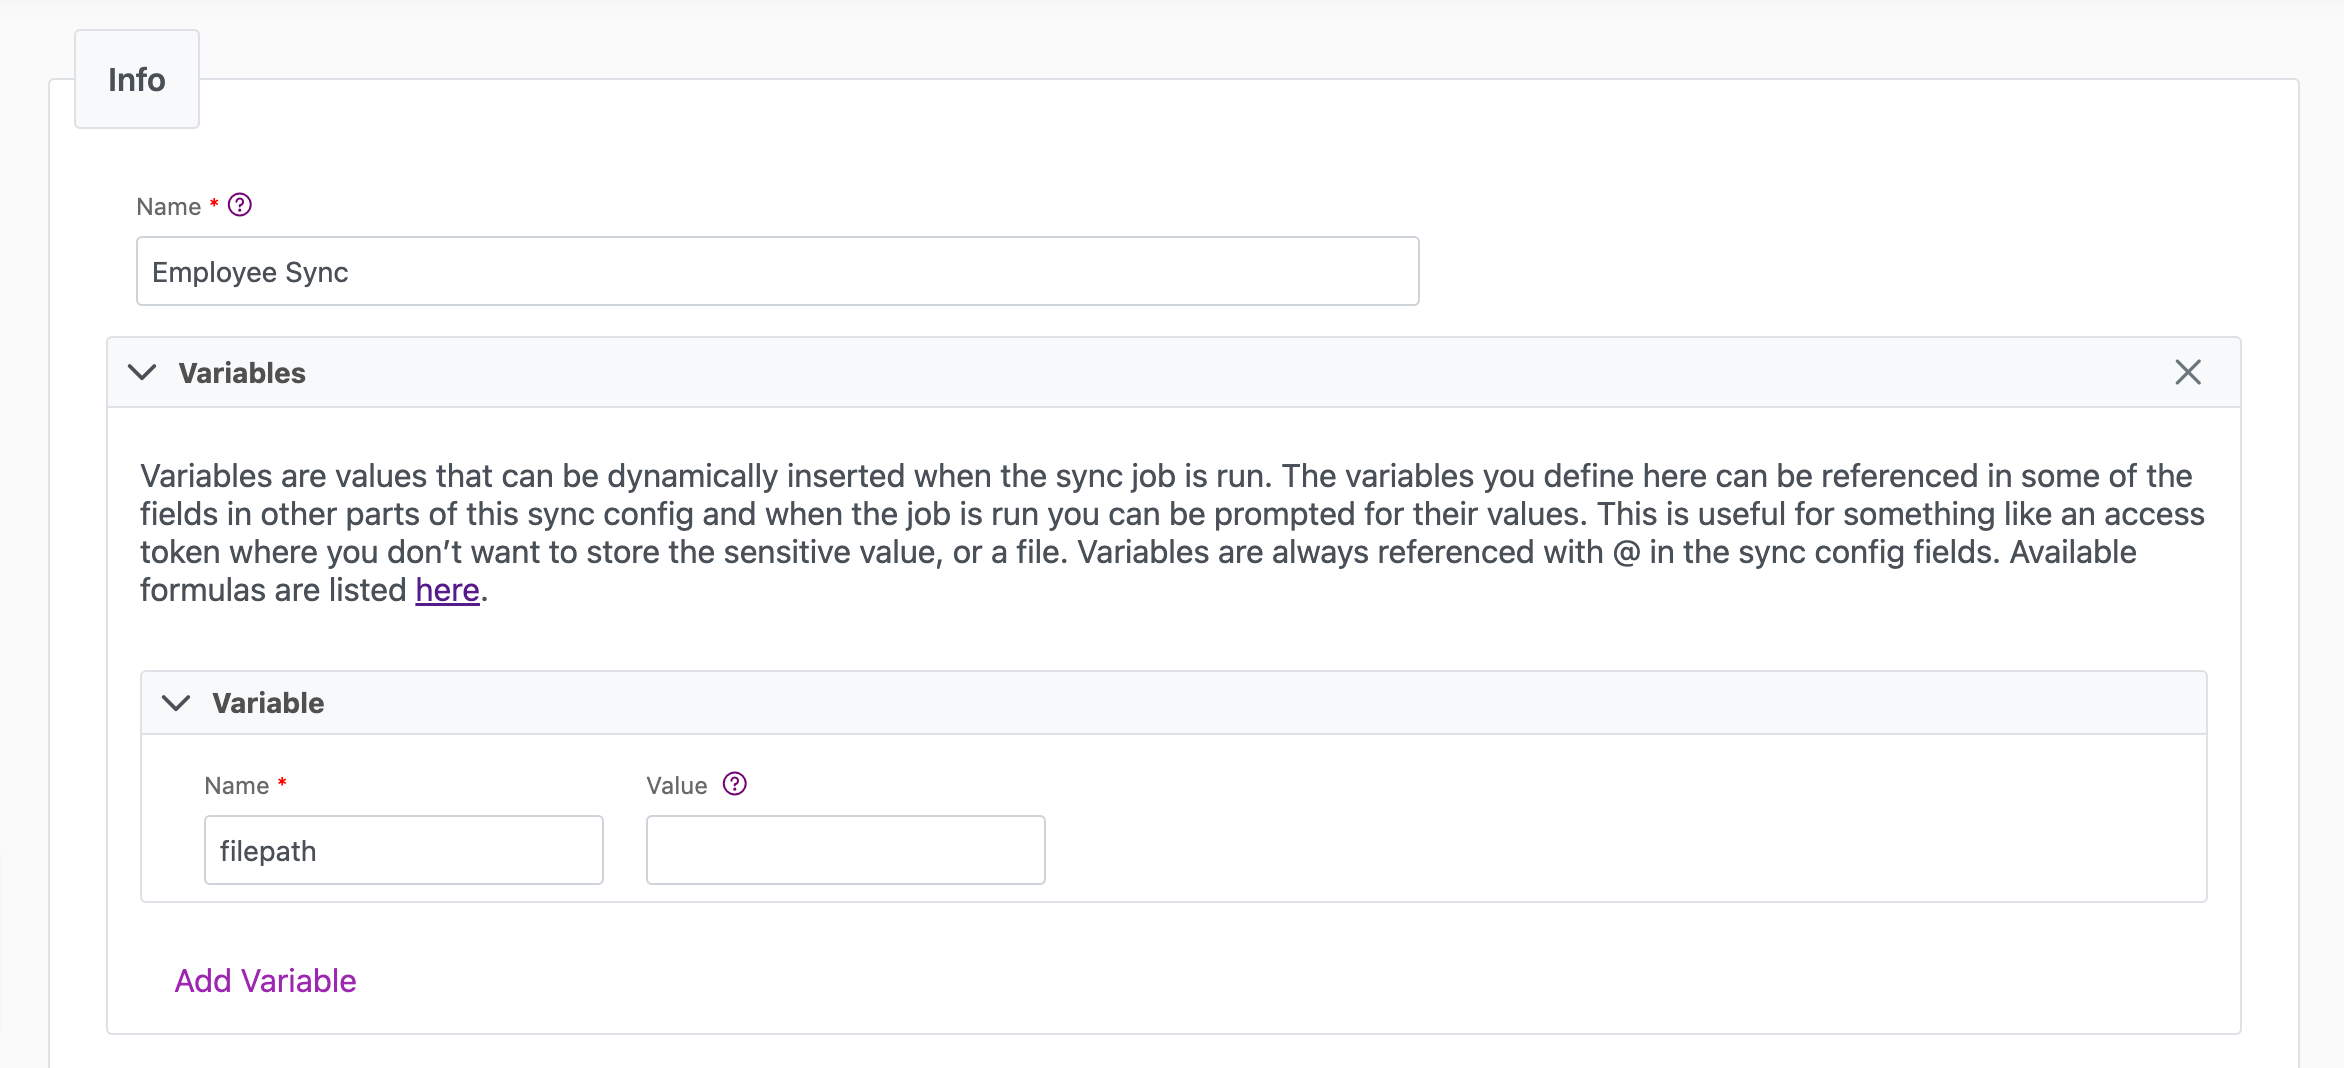
You can find the parameters in the Info tab below (Image 1).
Values
| Parameter | Description | Example |
|---|---|---|
| Title | Mandatory. Input a name for your data sync | Employee Sync |
| Variables | Optional. Review our documentation on Variables herefor more information about this field. When uploading a local file, set this to @filepath. | @Filepath |
| Permissions | Data syncs are role based access systems where you can give specific groups read, write, execute, and/or all of the above with admin access. Inputting at least an Admin Group is mandatory. |

Source tab
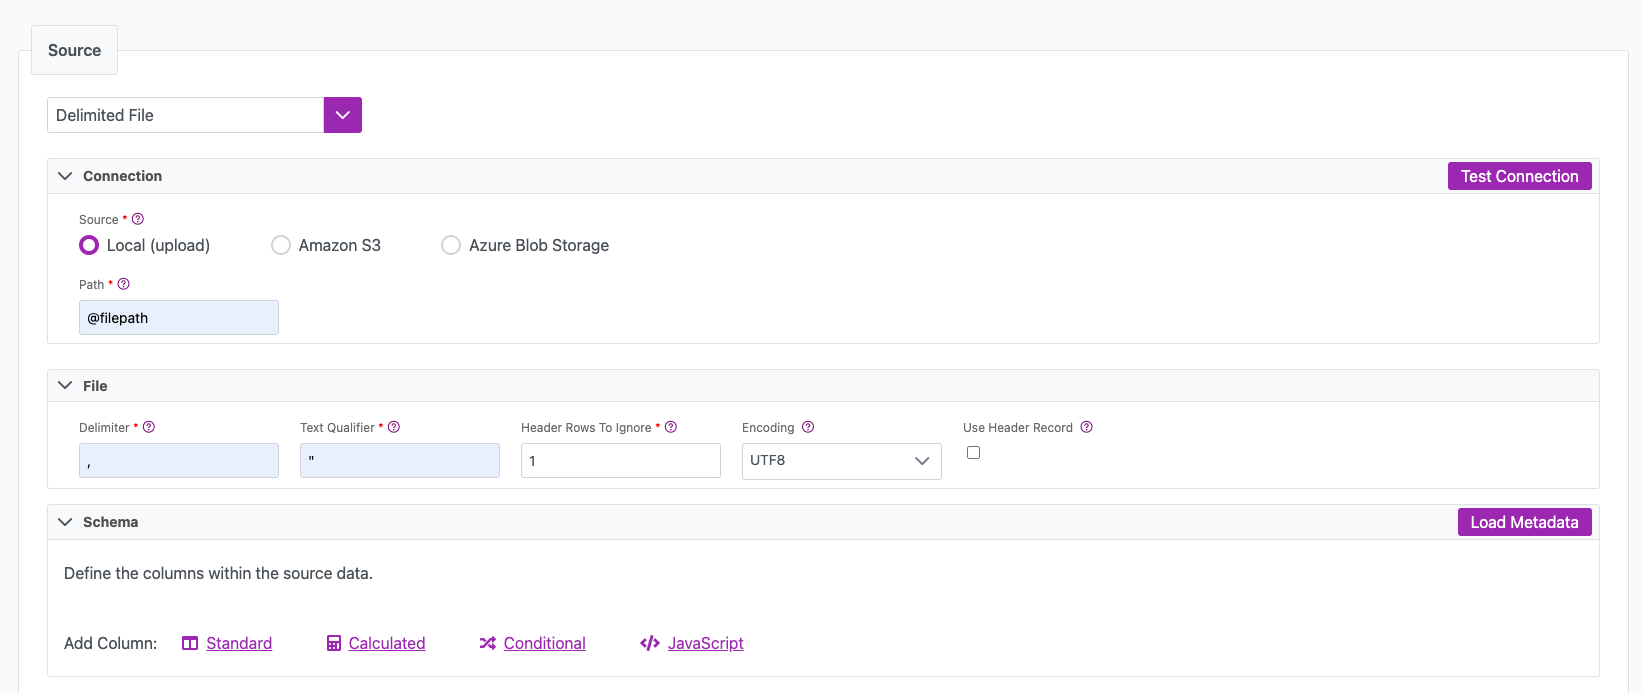
The following table outlines the mandatory and optional parameters you will find on the Source tab (Image 2).
- Source Details
- Schema
- Filter
The following parameters will help to define your data sync source and how it functions.
For information on setting up registered applications for S3 or Azure, please see the Registered Applications page.
| Parameter | Description | Example |
|---|---|---|
| (Sync) Source | Mandatory. Select your source from the drop down menu. | Delimited File |
| Source | The location of the source file. Either a Local upload, Amazon S3, or Azure Blob StorageThe following authentication methods are supported per source:Amazon S3: Access Key ID/Secret Access KeyAzure Blob Storage: Connection String | Local |
| Delimiter | Mandatory. The delimiter character used to separate the. text strings. Use U+#### syntax (U+0001) for unicode characters. | , |
| Text Qualifier | Mandatory. The text qualifier character, which is used in the event that the delimiter is contained within the row cell. Typically, the text qualifier is a double quote. | " |
| Header Rows to Ignore | Mandatory. The number of records from the top of the file to ignore before the data starts (includes column header).If you use both useHeaderRecord="true" and HeaderRowsToIgnore = 1, two rows will be ignored. Refer to the below to ensure you are receiving the results you want:One row as headers: useHeaderRecord="true" and HeaderRowsToIgnore = 0Two rows as headers: useHeaderRecord="true" and HeaderRowsToIgnore = 1 Three rows as headers: useHeaderRecord="true" and HeaderRowsToIgnore = 2 | 1 |
| Encoding | Optional. The encoding of the file. This default to UTF8, however also supports: UTF8_BOM, UTF16, ASCII. | |
| Use Header Record | Optional. Check this box to use the Header record to match schema. If set to true, fields not present in the record will default to null. | |
| Path | Mandatory. The path to the source file to load. To upload a local file, you must first insert a Parameter in the Info tab of the connection (ex: filepath). Then, you would reference that same value in this location (Ex: @Filepath). This will then trigger a File Upload option to import your file. | @Filepath |
| AuthType | This field defines the authentication type for your data sync. Cinchy supports "Access Key" and "IAM" role. When selecting Access Key, you must provide the key and key secret. When selecting IAM role, a new field will appear for you to paste in the role's Amazon Resource Name (ARN). You also must ensure that:The role must be configured to have at least read access to the source. The Connections pods' role must have permission to assume the role specified in the data sync config | |
| Test Connection | You can use the "Test Connection" button to ensure that your credentials are properly configured to access your source. If configured correctly, a "Connection Successful" pop-up will appear. If configured incorrectly, a "Connection Failed" pop-up will appear along with a link to the applicable error logs to help you troubleshoot. |
The Schema section is where you define which source columns you want to sync in your connection. You can repeat the values for multiple columns.
| Parameter | Description | Example |
|---|---|---|
| Name | Mandatory. The name of your column as it appears in the source. | Name |
| Alias | Optional. You may choose to use an alias on your column so that it has a different name in the data sync. | |
| Data Type | Mandatory. The data type of the column values. | Text |
| Description | Optional. You may choose to add a description to your column. |
Select Show Advanced for more options for the Schema section.
| Parameter | Description | Example |
|---|---|---|
| Mandatory |
| |
| Validate Data |
| |
| Trim Whitespace | Optional if data type = text. For Text data types, you can choose whether to trim the whitespace._ | |
| Max Length | Optional if data type = text. You can input a numerical value in this field that represents the maximum length of the data that can be synced in your column. If the value is exceeded, the row will be rejected (you can find this error in the Execution Log). |
You can choose to add in a Transformation > String Replacement by inputting the following:
| Parameter | Description | Example |
|---|---|---|
| Pattern | Mandatory if using a Transformation. The pattern for your string replacement. | |
| Replacement | What you want to replace your pattern with. |
Note that you can have more than one String Replacement
You have the option to add a source filter to your data sync. Please review the documentation here for more information on source filters.

Next steps
- Configure your Destination.
- Define your Sync Actions.
- Add in your Post Sync Scripts, if required.
- Click Jobs > Start a Job to begin your sync.
FAQ
Can I get a record count from a delimited file before running the CLI?
You can use PowerShell to count the lines in a delimited file and based on the result decide if you will run the CLI.
Open an instance of Powershell as the administrator and run the below code, which uses the following example values:
- File name: sample_150k.csv
- Record count threshold: 50000
$row_count=(get-content sample_150k.csv).length
write-host $row_count

If ($row_count -lt 50000)
{
     exit
}
else {
      Write-host "run CLI"
}
How do I parse a pipe delimited file using the CLI?
You can parse a pipe delimited file by setting the delimiter to |.
<DelimitedDataSource delimiter="|" textQualifier=""" headerRowsToIgnore="2" path="@filePath" encoding="UTF8">