Create forms with form designer
Overview
This page outlines how to create a form using the Form Designer, a simple alternative for making your forms.
Prerequisites
- Before creating a form, you must have the CLI package set up in your environment
- You must also have installed and configured the Meta-Forms experience
Create your form
The Form Designer helps create new Forms intuitively using the Forms experience itself.
This example creates a Contacts Form (Example Test) form to pull information from the Contacts table.
- Navigate to the Form Designer experience from the homepage (Image 1).

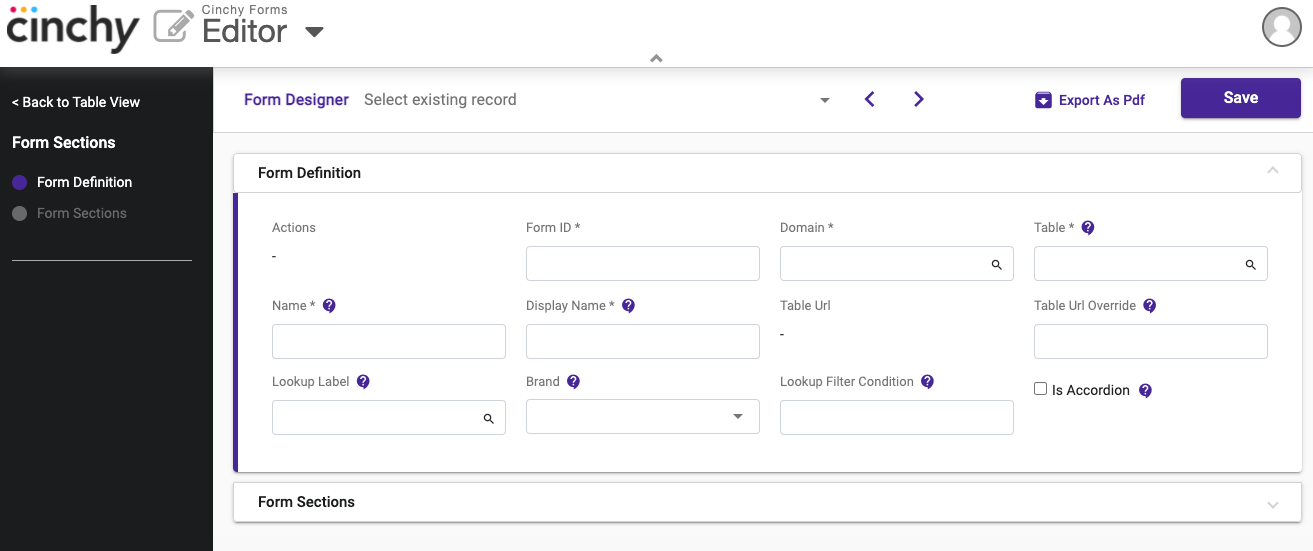
- Open up the experience and it should look like this (Image 2):

-
To create a new form, click the Create New Record button on the left-hand navigation pane.
-
In the Form Definitions section, fill in the following information and click Save once done (Image 4):
- Table: This will be the table that you want to push/pull information to/from. This example pulls information from the Contacts.People table.
- Name: The name of your form. This example uses Contacts Form (Example Test)
- Display Name: Enter a display name for your form. This example uses Contacts Form (Example Test)
- Lookup Label: This option will designate how you pull information from your assigned table. This example designates the Contacts.People.Name column from the Contacts table, to pull information based on a contact name.
- Is Accordion: Select this checkbox if you want the form to open in accordion format or not.
- Brand: Select a branding colour for this form.

- Once your Form Definitions are set, the Form Sections tab will open (Image 5).

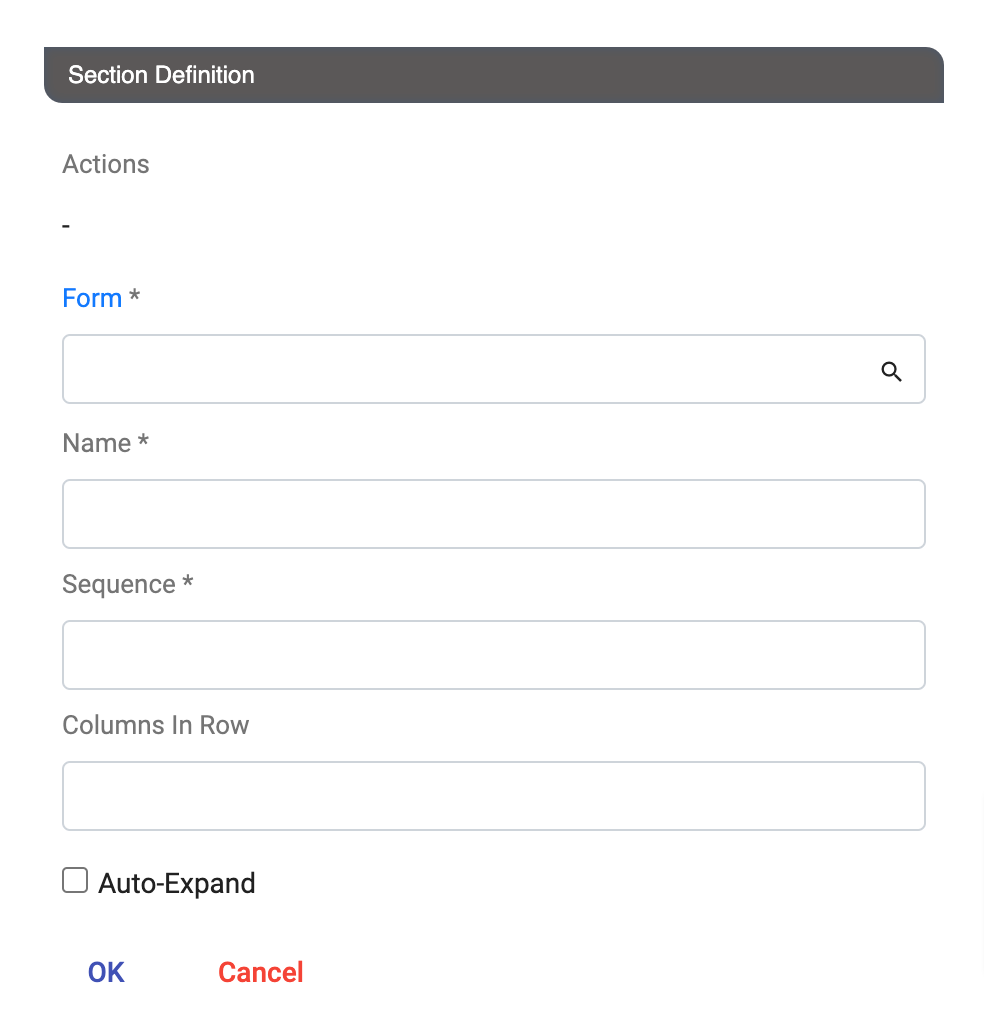
- Click on the + to add a Section Definition to your form (Image 6).

Add form sections
You can now add your Form Sections. This example adds three sections: Profile, Contact Info, and Company.
- Fill in the following information and select OK when done (Image 7):
- Name: Add in your section name. This example uses Profile, Contact Info, and Company,
- Sequence: Select the sequence that this section will show up on the form. 1 means it will show up first.
- Columns in Row: Select how many columns you'd like to appear in the row. This example uses 1 for the Profile section, and 2 for the Company and Contact Info sections.
- Auto Expand: Check this box if you want to the section to auto expand.
-
Click Save.
-
Within the Actions column of each of your sections, click on Design to navigate to the Form Section Designer.
-
Navigate to the Section Fields tab (Image 8).
-
Click on the + in the Fields tab to add a new Section Field. This example adds two fields to the Contact Info section of the form (since we designated it to have 2 columns per row in step 7).
-
Fill out the following sections and click OK when finished (Image 9):
- Table Column: The column you want to pull from/push to in this field. This example uses Contacts.People.Email and Contacts.People.Work Phone.
- Name: Select a name for your section. This example uses Email and Work Phone.
- Sequence Override: You can choose to override the sequence in which this section appears on the form, with the section listed as 1 appearing first.
- View Only: Check this box if you want this section to be viewable only.
-
Click Save.
-
Navigate back to your Forms Table, click Open, and it will appear with your sections and fields (Image 10):
Add the form to the homepage
- To add your form as an applet that users can bookmark and access, navigate to the Cinchy Applets table.
- In a new row, fill out the following information:
- Domain: The domain that your form sits in.
- Name: The name of your form/applet. This example uses Contacts Form (Example Test).
- Icon: Select an icon for the widget.
- Icon Colour
- Description: Add a description for your applet.
- Target Window: Select if you want you form to open in a new window or not.
- Application URL: Add in the URL to your form here.
- Users and Groups: Add in which users/groups can access your form in these columns.