Rich text editing in forms
Overview
Rich text editing was introduced to the Cinchy platform in version 5.4.
Customize the appearance of your text in Forms with our new rich text editing capabilities. Enabling this on your text columns will give you access to formatting options for text previously unavailable in Forms such as:
- Bold, Italic, Underlined text
- Checklists
- Headers
- Code Blocks
- etc.
You have the option to output the data as HTML.
Enable rich text editing
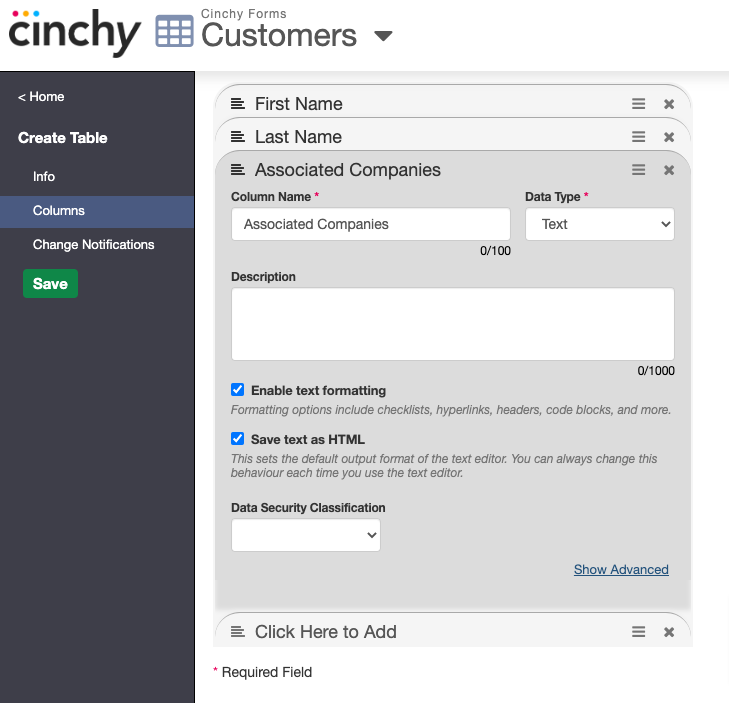
You can enable rich text editing on your Form text columns through the Design Table tab of your form table (Image 1).
- Enable text formatting: Checking this enables the rich text editor in Forms.
- Save text as HTML: If you need the data saved from the rich text editor to be in HTML format, check this box.
- Max Characters: The rich text editor saves data in Cinchy as structured data (or HTML), which is much more verbose than your actual text. This number should be at least 10,000 characters.

Use the rich text editor
Once you have enabled rich text editing on your text column for your form, you can use the capabilities by navigating to your form applet.
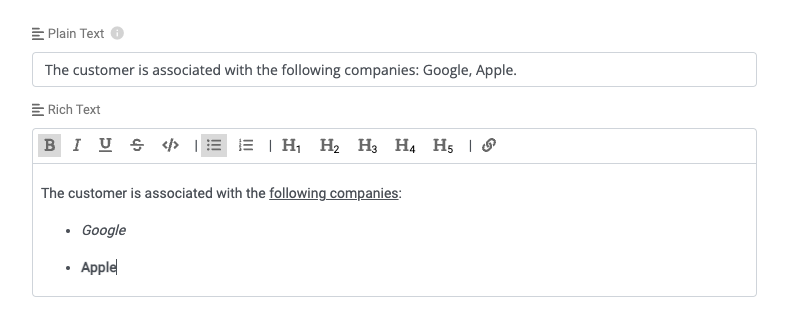
You will see all the formatting options available to you in the editor toolbar (Image 2). A form field that doesn't have rich text enabled appears like the "Plaintext" section below.

Note: If you have an understanding of HTML, you can edit the data directly in the table cell and it will automatically reflect in your form. Be mindful that if you write invalid HTML, you will potentially see unexpected results in the Rich Text Editor. You can always revert changes using the collaboration log.
Examples
The below section outlines some examples of what you can do with the rich text editor.
Example A
The below example (Image 3) shows using the following rich text capabilities:
- Bulleted Lists
- Bold
- Italics
- Underlined

Example B
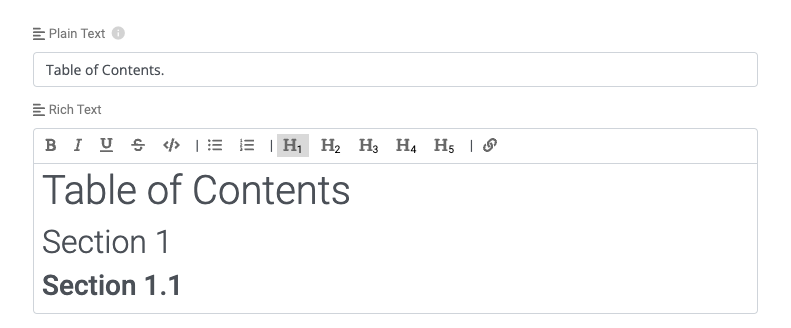
The below example (Image 3) shows using the following rich text capabilities:
- Headings 1, 2, 3

Example C
The below example (Image 4) shows using the following rich text capabilities:
- Linking

Output
As you can see below, the text you enter into the Rich Text Editor is saved as structured data (Image 5), and when the "Save text as HTML" option is checked in your column settings, it's saved as HTML (Image 6).

