IIS installation
Prerequisites
To install Cinchy Meta-Forms for IIS, you will need:
- The Cinchy Platform.
- The Cinchy CLI.
- Ensure that the IIS extension "URL Rewrite" is installed on the server hosting IIS. The extension is available here: https://www.iis.net/downloads/microsoft/url-rewrite
Download the resources
The Cinchy Meta-Forms code is on GitHub. For an IIS deployment, you need to download the Meta-Forms-Data-Experience zip file and the Meta-Forms-App-Experience zip file.
Ensure that you download the latest version.
Deploy the app experience
-
Create a C:/Cinchy Applets folder if it doesn't exist and check in the App Experience code.
-
If you have multiple instances, create a folder that corresponds to the name of your Cinchy instance (C:/CinchyApplets/DXdemo) and place the extracted App Experience folder here.
-
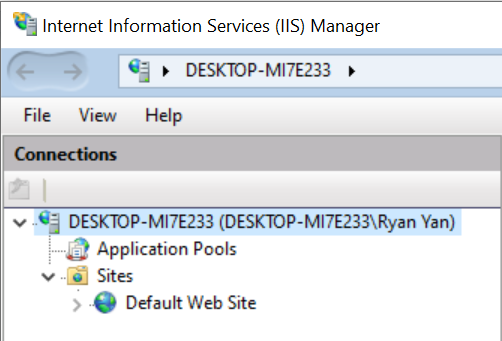
Open your IIS Manager.
-
Navigate to IIS Connections.
-
Right Click the Cinchy Server name.

- Expand Sites such that “Default Web Site” is visible.
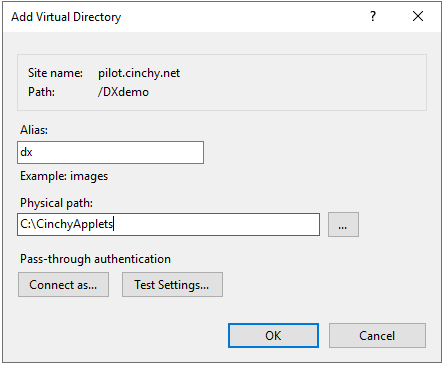
- Navigate to the site containing your Cinchy application and select Add Virtual Directory.
- Name the Alias of this directory DX.

- Input the path to Cinchy Applets directory in the Physical Path field.
- Right click on the meta-forms folder under the DX virtual directory and select Convert to Application.
Update configurations
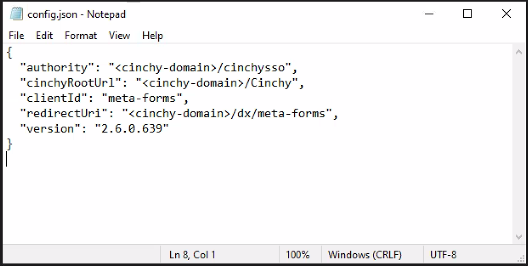
- Locate "\assets\config.json" and input your Cinchy domain as specified below.

Additional changes
If you haven't deployed Cinchy at the root of your domain on IIS, then you need to complete the steps below.
- Specify the path to your 'meta-forms' application as instructed below.
- Locate the
C:\CinchyApplets\<Cinchy Environment>\Meta-Forms-App-Experience\index.htmlfile and update the base HREF to the path to your edit-form application on IIS and save.
Deploy the data experience
-
Navigate to the Meta-Forms-Data-Experience package.
-
Open "\post-install\post-install-1.sql" and replace the below with your own URLs.
SET @CinchyURL = 'https://pilot.cinchy.net/DXdemo/Cinchy'
SET @MetaFormsURL = 'https://pilot.cinchy.net/DXdemo/dx/metaforms' -
Open an instance of PowerShell or similar terminal from within the Meta-Forms-Data-Experience.
-
Run the below command, using the table as a guide and inputting your own parameters.
./CinchyDXD.ps1 install -s "cinchy.com/cinchy" -h -sso "cinchy.com/sso" -u user -p pass -c "C:\Users\Downloads\Cinchy Connections v5.5.3\Cinchy Connections CLI\Cinchy Connections CLI (win-x64)" -d "C:\sometempdirectory" -e
| Required Command | Description |
|---|---|
| -s, --Cinchy Server | Required. The full path to the Cinchy server without the protocol (cinchy.com/Cinchy). |
| -h, --https | Flag indicating connections to Cinchy should be over HTTPS. |
| -sso | The full path to the CinchySSO server without the protocol (cinchy.com/CinchySSO). This is only required if your CinchySSO server is different than /CinchySSO. |
| -u, --Username | Required. The user id for accessing Cinchy. |
| -p, --Password | Required. The clear text password (unencrypted) of the specified user. |
| -c, --CinchyCLI Directory | Required. The path to the Cinchy CLI. |
| -d, --CinchyCLI Temp Directory | Required. The path to the directory that the CLI can use for storing temporary files to support the sync (such as partitioned data). |
| -e | Required if you are running the CLI via .exe instead of .dll. |
Confirm your installation
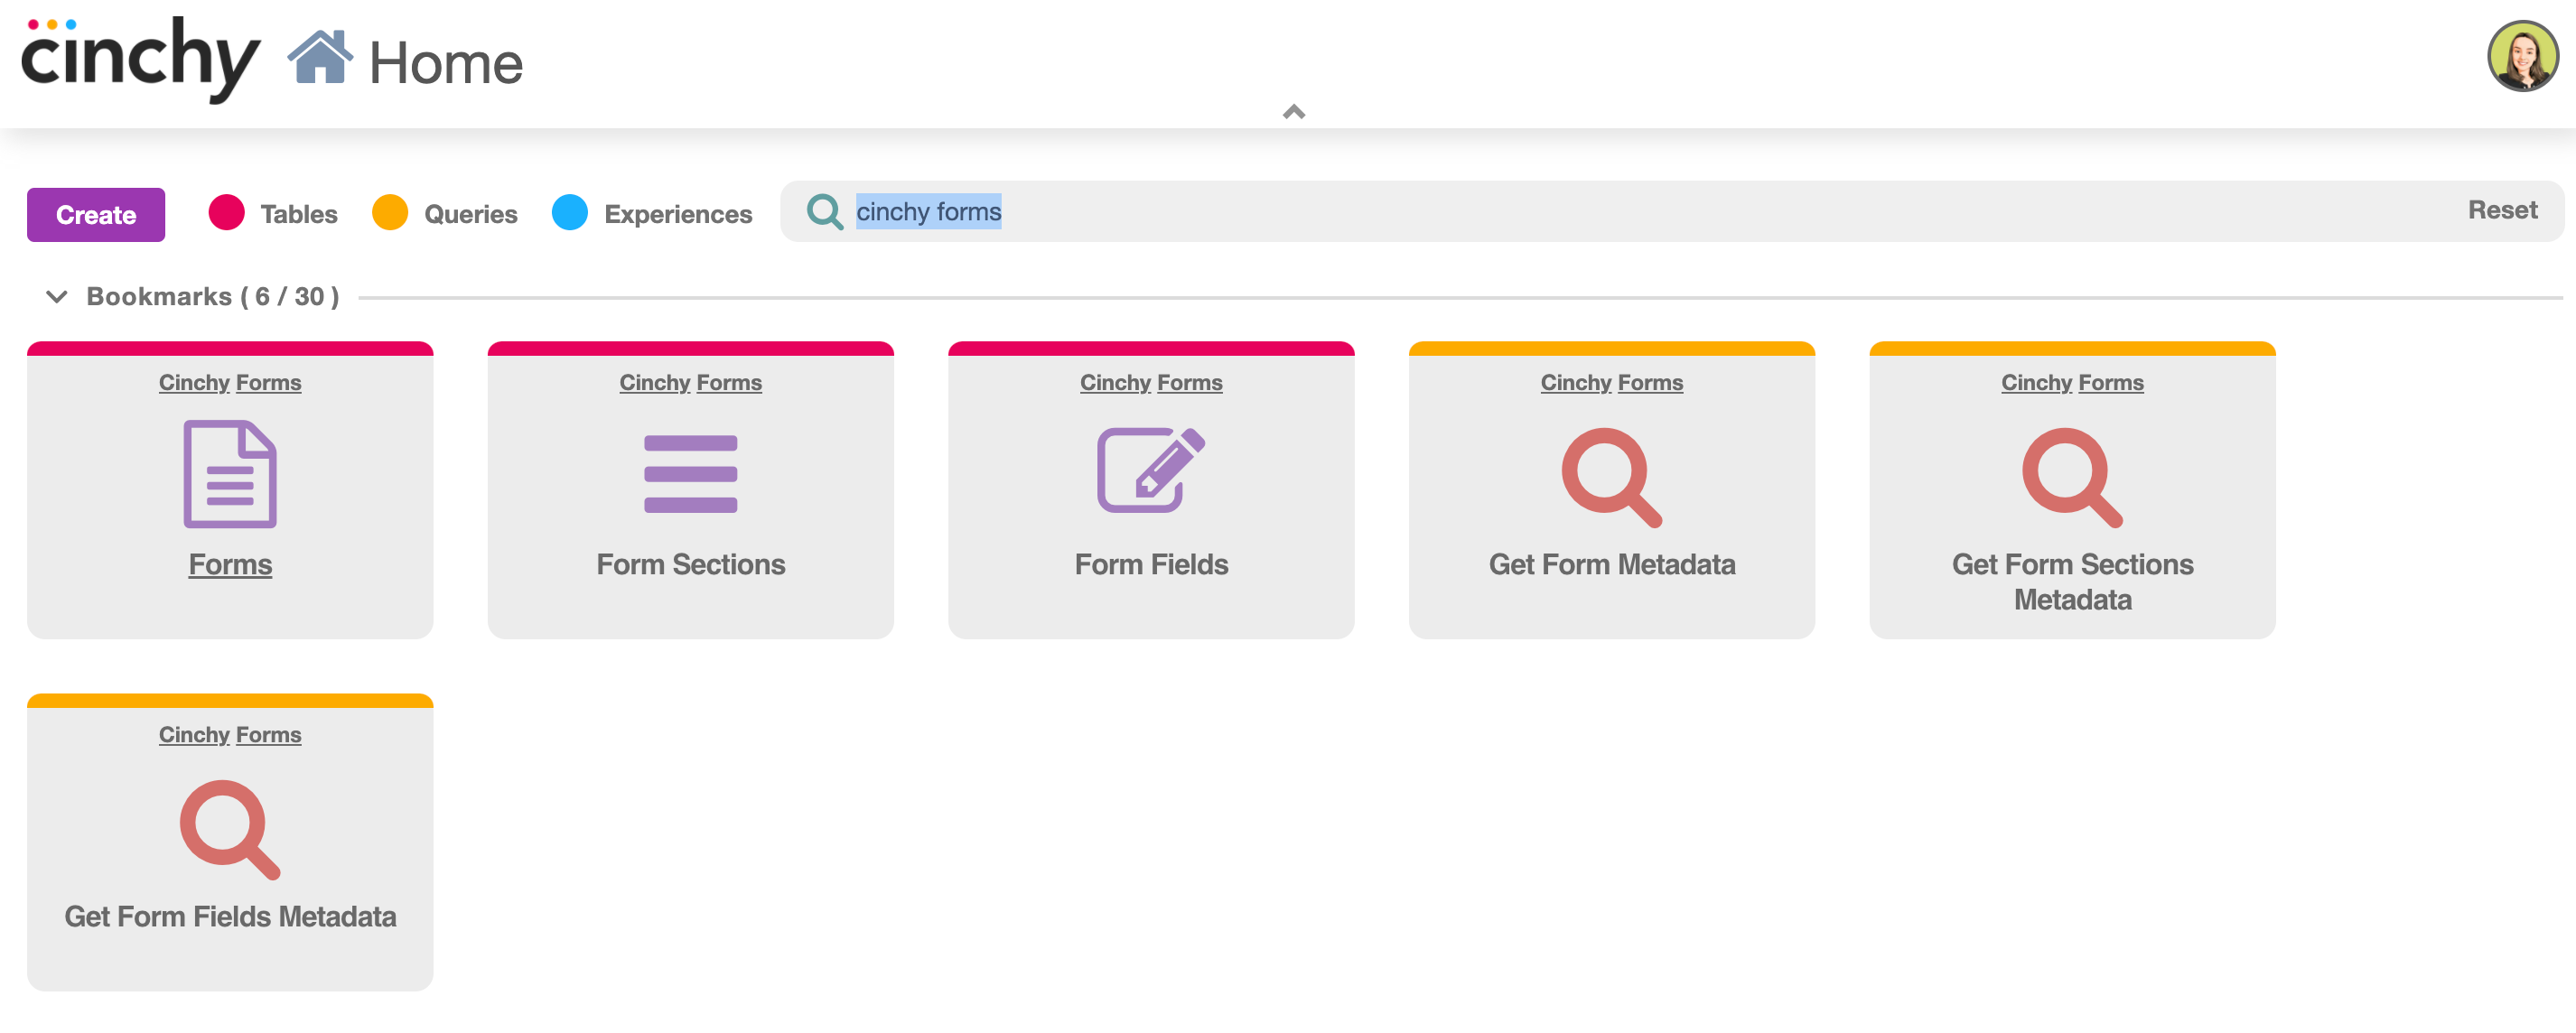
Once you have installed the experience, your environment will be populated with these tables and queries:
- Forms table
- Forms Sections table
- Form Fields table
- Get Form Metadata query
- Get Form Sections Metadata query
- Get Form Fields Metadata

Forms table: This table houses all the existing forms in your environment. Adding an entry to this table, will add a form to the complete list of forms. The table is used to link form fields and form sections to one specific form, and it connects to the table which contains all of the form responses/data.
Form Sections table: Use this table to create separation between parts of the form. For instance, when creating a quiz based on compliance, you can use this table to create a section for the technological questions, one for the policy based questions, and one for any possible quiz feedback. A new form section can be created by adding a new entry to this table. The form sections need to be connected to the form created in the Forms table.
Form Fields table: Use this table to create all the possible data entry fields associated with the form sections within the form. To create a new form field, simply add an entry to the table and connect it to the form section. In the example of the quiz, add an entry for every question and link it to the appropriate form section.
Get Form MetaData query: This query will return the metadata of your form, using the form ID present in the Forms table. The resulting metadata shows whether a form field is mandatory or not, the choices present for each question, the column names and types in the table containing your form data, the form fields and sections, and the JSON data.
Get Form Sections query: This query uses the form ID, present in the Forms table, to return all the form sections present within the form.
For any users who want to access forms/want forms to execute properly, they need to have access to all the following tables and queries. These include the three tables and two queries shown above, as well as the Tables, Table Columns, and Domains tables within that user's specific environment.